Designing Domesticity Our Home Projects Food Services Shop About

End of Summer Relaxin'

As the summer draws to an end, the nights and mornings are becoming a bit cooler - this is when our porch really shines and gets the most use.

Come on in and take a look...


We've changed things around a bit since last summer. Partially due to the updates in the kitchen and partially for functionality purposes. 

The next couple of images are from last summer. 

Summer 2010

Summer 2010

Now back to this summer...


Our new back door. And you remember my thrifty find - the iron wall planter
And my refinished wicker chest.


This tray was the color scheme inspiration for the porch this year. I wanted to add a bit of coral with the existing green and blue scheme.


Almost time to put the shells away and bring out the fall decor. 
Not quite yet though. 

 I hope you are enjoying the end of your summer!

Linking in with: 


If you enjoyed this post, might I suggest:


Until next time, 
Read more ...

The Plan for Pillows

The window panels are finished, hung and looking beautiful - if I do say so myself! 

So what's next, you want to know?


Tackling the easiest project first; I'm going for pillows!

Wanna take a peek at my fabrics?


I think I've run the gamut in terms of possible combinations. 
I have a solid, stripe, plaid, floral and scroll - plus a couple of trim options thrown in. 

If you're interested in learning more about my philosophy on mixing fabrics, check out my guest post over at Three Boys .

Stay tuned for the reveal. 
And the heavy work - tackling that rustic pine armoire!

Until next time, 
Read more ...

How to Make your own Window Panels

First off, I'd like to say thanks so much for all the lovely comments on my new window panels. 
I really am loving them and loving the fact that you love them too! 
That's a whole lotta love going around!

Today, I thought I'd share the quick process of how to make some of your very own.

Let's get started:


I started by removing the drapery lining from my old drapes. Not only did this save a lot of money in terms of purchasing new, but it also provided a rough template for the length and width of the new curtains!
Bonus!

What's the benefit of adding a liner, you may ask:
1. helps with light filtration
2. helps to reduce the risk of fading from the sun
3. gives a cleaner and more professional look from the outside
4. helps to stop drafts in the colder months

see, pretty important, actually.


Find a place to lay out your fabric in it's entirety. 
I needed panels that were 94" long when complete. Therefore I cut them 99" long to allow for seams at the top and bottom. 


Add your liner, making sure to center and leave at least a 1" margin across the top.


Then, it's just a matter of getting down to the pining, really.
Fold over your fabric to create a 2" seam across the top. 
Pin in place.
I found that a right angle really helped to keep everything nice and even and straight.


Fold your fabric to the edge of your liner on the sides. 
Because I was working with striped fabric, I had a nice built-in line to work with!
Lucky me. 
Repeat on the other side.


Across the bottom, fold your fabric up to the required length, in my case, it was 94"; pin in place.
I like a 3" seam across the bottom, hence measuring 99" to begin with. 

This picture is a little misleading because it's the first panel I did and I was working with a pre-cut 3 yard piece of fabric. 


When it's all said and done, it should look a little like this.

Now, this may shock some of you, but at this point, I folded up all my panels and took them to the dry cleaner to be stitched up! 
I know, the shock horror of it all, but I can't really sew and I knew these panels were a real investment that I wanted to last a long time - so there you go! 
Plus, she only charged me $20 a panel, which I thought was a steal!


Once I got the panels home again from the dry cleaner, I added my drapery pins.
Be sure to pin them through the back of the fabric only - no one wants to see a pin on front, now do they? 
Of course, I saved these from my original curtains.
Waste not, want not! 
Right?

I used 7 pins per panel. Start with the first and last, then add the middle and finally two between the first and middle and two between the middle and last. This helps to ensure even placement. 


Then I added my pins directly to the rings. 
Personally, I'm not a huge fan of the clips - not sure why really - kind of fussy for my taste.
I think rings without clips has a cleaner and more custom look. 


So there you have it, the story of my new window panels and my dirty little secret!

Other posts you might enjoy:


Until next time, 
Read more ...

Living Room Window Panel Before and After Reveal

It's been a long time in the making, but I am excited to share with you my now complete window panels. 
As you probably know, I really hummed and hawed over the fabric selection. 
For a recap on everything I debated on, click here and here


But, I am so happy with the results.

I only wish that taking good photos of curtains was easier so you could get a real sense of how great they look!
I've done my best...

I, like you, love a good before and after. 
So, here are a couple for your enjoyment!


Before - seems so bare now.


After - with all that lovely day light streaming in.
It's amazing how a simple window panel can really finish off a room!


And at night - I love how cozy it feels now! 
Just in time for Fall...


Before


After - daytime.


After - night time.


This shot really shows the colors as true as possible. The light yellow stripe picks up the color on the walls, while the coral stripe ties in with the couch and the blue works well with the rugs.

I am also loving the texture; the linen is slightly crumply which gives it a relaxed, yet elegant feel. 
Rustic elegance as I like to call it!

I'll be back later with the tutorial - it really was fairly budget friendly - working with some existing pieces, I managed to make 8 window panels for around $500. Of course, this isn't pennies, but if compared to the $500 I spent on 4 store bought panels in our bedroom - it seems like a great deal! Plus these are personalized!

If only I had known then what I know now. 
Hindsight is 20/20!

Linking in with:

Until next time, 
Read more ...

Plans, Plans, Plans...for the Living Room

So, this turned out to be the week of food posts! Not really intentional, but sometimes you just got to go with it. You know?

Anyway, I feel like my head is full of ideas for the house. 
Perhaps it's the impending arrival of the baby - the whole nesting phase, we'll see. 

At any rate, now that the kitchen is complete - it's time to turn my attentions to our living room. 

Here are my thoughts at the moment:


The List:

Make and hang curtains
New pillows
Update the armoire
Update table between chairs
New chairs

Phew! 
Seems like a long one. 
And with little to no budget - this should be interesting.

Be sure to stay tuned as the updates start rolling in!

Other plans for around the house, you may ask?
Finish the guest bedroom (click here to see the progress made thus far) - kind of left you hanging on that one. 
Update the nursery and ready it for our new arrival.
Finish off the screened-in porch.

Until next time, 
Read more ...

Ricotta: two ways

Remember our list of goals to enjoy life in the here and now? And how Mr. DD held up his end of the bargain (and is already talking about his next bread challenge)? 

Clearly, it's my turn. 

Cheese making is not for the faint of heart, so I decided to start off simply.

What's the easiest type of cheese to make: Ricotta.


There are loads of recipes out there; I turned to my old stand-by, Barefoot Contessa for inspiration. 
Click the link to see the recipe in full.

I cut the recipe in half and eliminated the heavy cream.

Gather your ingredients:
3 cups whole milk
1/2 tsp salt
1.5 TBS white wine vinegar


Bring the milk and salt to a full boil.


Off the heat, add the vinegar. Let stand for 1 minute until the mixture curdles. 
Um, lovely.

Pour into a sieve lined with damp cheese cloth. 
Let drain 20-25 minutes at room temperature.


Voila!
Use immediately or cover and refrigerate.


Starter: homemade ricotta with fresh from the garden simple tomato salad and homemade baguette. 


Dessert: Grilled peaches with homemade ricotta, runny honey and cinnamon. 

Honestly, this could not have been easier.
And it was great knowing exactly what was in the food I was feeding my family!

Give it a try!

Guess I'll have to step up my game in my next cheese making challenge.

Anyone have a recommendation?

Until next time, 
Read more ...

Bread for the Soul

Yesterday, I told you all about our plans for enjoying life in the here and now.

Well, I thought you'd be pleased to know that Mr. DD obviously took our conversation to heart, because he treated us to a first round of homemade bread - fresh from the oven baguettes for breakfast anyone?

Um, yes please!


For a first timer, he said it was actually easier than one would have thought.

Gather your ingredients: flour, water, salt, dry active yeast.

Check out this link to see the recipe he followed. 


Mix the dry ingredients first and then add in the water.  

As much as they say baking is a science, this seems to have a bit of wiggle room. 

The key was to create just the right amount of stickiness. 
 The dough should stick to the bottom of the mixer but not the sides, so adjust with water and flour as needed.


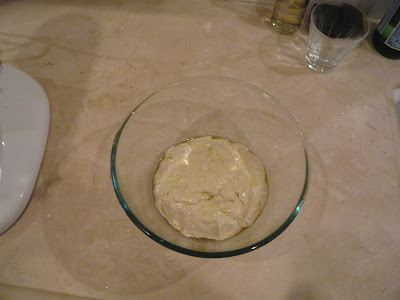
The dough was then placed in a well oiled bowl, covered with Cling Film and refrigerated overnight.  The long process of cold fermentation gives added flavor to the dough while also producing bread that lasts longer before going stale.

The dough did rise some over night, but the real rising took place Saturday morning. Once removed from the fridge, it sat at room temperature for 3 hours.

(Now we know why bakers get up so early in the morning!)


Place the dough on a floured surface, then pull and stretch to approximately a foot long and 8 inches wide.
No kneading or rolling pin necessary!


Then cut into even portions.


Form into baguettes and place on parchment paper, score across the top.

Preheat your oven to 500degrees F, including your pizza or bread stone.  If your oven doesn't go to 500 degrees, that's ok, but crank it up as high as it will go because super-high heat is critical to the magic.


Essential for the European style crusty bread - a tray of water in included in the oven and the sides of the oven are squirted with water. 
(or in our case, flicked with water as we didn't have a spare spray bottle handy)

The dough should be placed directly on the stone. 


20 minutes later ... and check out those results! 

Yum! 
Now that's a good breakfast. 

Not to mention afternoon snack and evening appetizer!

Thanks Mr. DD for the lovely treat - now keep up the good work!

***This post was co-written by Mr. DD and me*** 
(His first written appearance on Designing Domesticity!)
We hope it has inspired you to give homemade bread baking a try - we've got a lot more experimenting coming your way, so stay tuned.

Another quick shout out: the recipe shown above is the closest rendition to the methods learned from the famous bakers at Paul bakery in the UK.
(for those of you lucky enough to live near a Paul in Washington DC or in Florida, their bread is the best!).

Until next time, 

Read more ...

Brown, Brown, Brown...No More!

In my ongoing quest to lighten and brighten the living room, I noticed that this side of the room contains quite a bit of brown. 


Eventually, I'd love to replace these chairs or at least re-upholster the floral chair, but that's not going to happen anytime soon, so it's time to get creative.


I re-upholstered this ottoman a couple of years back and it's been living in our basement family room since we moved into this house. 

The plan was to re-upholster again and replace the leather ottoman in our living room.


Huh, would you look at that...once I removed the red ticking stripe, I was surprised to find this fabric in perfect condition underneath. Forgot that was under there!


I had planned to use this burlap fabric, but the color is so similar to the existing fabric, that it almost seems silly.
I know, more brown, but so much lighter - right??


In the end, I kept the fabric and finished off the ottoman with upholstery webbing that I hot glued in place. 


Much lighter and brighter. Plus, I really like how it ties in with the sisal rug.


One more change to let you in on...I removed the brown floral slipcover on the overstuffed chair.
What do you think? 

Again, I'm not totally in love with this fabric (which is probably why I slipcovered it 7 years ago!) but it does help to lighten the overall scheme. 

I'll keep it for now - that's the beauty of a slip cover, I can always put it back on!

Linking in with:

Until next time, 
Read more ...
Related Posts Plugin for WordPress, Blogger...

Lijit Ad Wijit