Designing Domesticity Our Home Projects Food Services Shop About

Wall Art: Keeping it Cheap

Well, I blew my entire budget, both money and time wise, on the endless search for bedding for our guest room. A blown budget wouldn't be too bad if the project was finished, but unfortunately, this one is not. I still need artwork.


So, what did I do? 
Let me tell you, I did NOT reinvent the wheel. Seriously, if it's a good idea, why mess with it.
I've had this book for years, purchased in Italy, for no other reason than just this. Beautiful, inexpensive art. 

As luck would have it, I wondered across the frames at Target, on sale. Buy one, get one 50% off. Good deal. 


I choose the black frames to tie in with the curtain rod. Plus, I thought the white frame on the light paint would look a little too feminine/country. I'm liking some of the darker accents in the space to help keep is grounded.


I also put a bit of this fabric in a frame. Why? Because when you are so off base with your fabrics, all you can do is laugh. 

Every room needs a bit of the unexpected or whimsy and every time I look at this frame, I will definitely be laughing! 

Reveal coming up next. Stay tuned.

Until next time, 

Read more ...

Bedding: Mixing and Matching

I definitely learned the hard way that adding onto existing bedding is not only challenging, but sometimes nearly impossible! But after loads of searching, I finally came up with something I am really happy with. Take a look.


Perhaps we should back track a bit and start from the beginning. This is the quilt that I wanted to work with. A beautiful color, but not the best print. 


It always felt a bit too country to me. My goal was to mix it up with a more modern style quilt, which would hopefully elevate the style of the whole room.


Here's what I found. A modern quilt, featuring a square pattern to contrast with the small floral print of the existing quilt. It picks up the blue/grey color as well as the two pinks in the flowers. Coordinating enough to go together, but contrasting enough to bring real interest to the space. 

Once the two quilts were together the pink really called out as the accent color. I knew what I was looking for in terms of color for the throw pillows, but patterns was another story...


Alas, I persevered, but it wasn't entirely simple.
Throw in my two homemade pillows and one store bought pillow and it's really starting to come together. 

I found the stripe at a local fabric store and also picked up a cabbage rose style fabric, but when I got them home the cabbage rose made the whole scheme seem too country. Back to the drawing board. 

Another trip to HomeGoods resulted in the pillow with all the quilted circles. It's the perfect, modern accompaniment that picked up all the colors of the square patterned quilt.


Sitting in the living room thinking about my bedding debacle, I looked over and realized the suzani fabric I used in our throw cushions could be the perfect compliment to the quilted pillow. I like how it picks up on the circular pattern and the floral at the same time.

And that's the story of how it all came together. Fairly long-winded, but the result is all that counts, right?

Next up, artwork. And then the full reveal. Looks like I might actually make my deadline after all.

Until next time, 
Read more ...

I Did It!

And it wasn't even that hard. Thanks to the many tutorials out there and to my avid reader, MF, for passing down her sewing machine, I am now the proud owner of two handmade pillows. 


What I thought would be a project that overtook the entire weekend, was actually completed in under 2 hours. And those two hours also included the homecoming of Mr. DD who had been in Asia for business, the calming of a non-napping almost 5 month old, and an extended conversation with my almost 4 year old who also didn't want to have quiet time. Not to mention the endless Instagram and Facebook updates!

Like I said, there are a million and one envelope pillow tutorials out there. And seeing as this was my first time, I'm probably not the source to go to on this one. But, I'm so excited with how they turned out, that I'm still going to share how they came to be. 


So, here goes:
Once you have your pillow form and fabric selected, start by cutting your fabric to size.

Basically, you'll need the length of your pillow by the height of your pillow x 2 + 4 inches.

for my 22x22 pillow form, I needed 22in L by (22in H x 2+4=48), in other words 22L x 48H
for my 16x12 pillow form, I needed 16in L by (12in H x 2+4=28), in other words 16L x 28H

Hopefully that's not too confusing. 


After your fabric is cut to the correct size, iron to smooth out any wrinkles. Place the print side away from you, fold over a 1/4inch on the short side of the fabric and iron over. Repeat for the opposite side. These to-be seams will become the envelope closure.


Now the hard part (at least for me). Sit down to your machine and face your fears because it's really not that hard. It's just a matter of getting started. Take a deep breath and sew that first seam, keeping it nice and straight.


Phew, now that that's done you can finally exhale that deep breath because the project is already half done and you only had to sew two straight lines!

Next, turn your fabric right side up and fold the ends in, creating a 3.5 inch overlap in the center. 


At this point, you can choose to pin your fabric or don't - it's up to you. Of course, I did, because I am a scaredy cat and it was my first time. 

Then, it's back to the machine to sew the two long lengths of fabric, using a 1/2inch seam. Once it's done, turn right side out and iron again. 


Would you look at that. You just made a pillow form. I know, I am super impressed too!


Here's a shot of the envelope back, just in case you are wondering what they'll look like. Pretty, right? 
I'm still not entirely sure why my pink stripe pillow looks more rectangle than square, but whatever, at least I made them and they are done. Yeah. I feel so very accomplished!

I'm sure, if you are a real seamstress and read all the way through this tutorial you are probably rolling your eyes and thinking to yourself: Geez, girl! It's not rocket science. 
And now, I can confidently say: You're right, it's not. 

Next up, the bedding reveal. I know you are excited. Plus, I'm pretty sure you have a good idea of the direction I went! 

Linking in with:


Until next time, 

Read more ...

Bedding Debacle

I mentioned earlier this week that my next big undertaking in the guest bedroom would be the bedding. Of course, this seems like it would be so easy. Source a new bedding set, purchase, install in the bedroom. But oh no, not me. I have to make it difficult.


I want to incorporate what I have AND I want it to look collected { i.e. no sets}. And eclectic. And cottage-y, but not TOO predictably cottage-y. I want it all and I want it now. 

With a wish list like this, I am most definitely setting myself up to fail.


This is how the bedding has been looking for at least the last year. I found the tonal shams at HomeGoods and picked them up thinking they would make a great building block. 

You see, the quilt is amongst the first purchases Mr. DD and I made on our countryside jaunts while living in London. I loved it in the package, got it home and made up the guest bed and soon got over it. The small floral print was a little too country, but I still loved the base color. And, quite frankly, heading back out to the countryside just wasn't going to happen. I had to live with it.

So I started looking...


Some quilts made it into the cart, but never out of the store.


Others never left the packaging once they got home. 


Still others had to be restuffed into the package to be returned.

I have looked at hundreds of quilts {at least that's how it feels}. Finding both colors and patterns to coordinate has been ridiculously hard. 


And don't even get me started on the throw pillows. After endless searching, I started looking at fabric to make my own. 

Just when I thought I had it sorted, it all started to look too predictably country cottage-y. That's not the look I wanted. So I went off the wall and got crazy samples like this one.


Epic Fail.
Aye, so many options. So may returns! 


I'm happy to report that I am making progress. After years of searching, even deciding on just two coordinating options is a HUGE step in the right direction.  And hopefully, my self inflicted deadline to finish this room by the end of the month will give me the motivation to power through.

I'd love to hear what you'd do with this quilt. Please share. The more the merrier; seriously, at this point, I feel like I have explored every option.

To quiet my mind, I am going to attempt to make my own pillow cover this weekend. Should be interesting.

Until next time,
Read more ...

Reader Renovation: Living Room Rearrangement

While I continue to work in the guest room, I thought I'd change directions for a bit and share another installment of my new series, Reader Renovations


We're back at my sister-in-law's house, this time working in the living room. Taking a look at this room, you'd probably think it looks great and doesn't need much work. I'd say the same thing, but its not my opinion that matters.

My sister-in-law has never been thrilled with the layout and struggles placing her accessories. Fortunately, she has great taste - so there is plenty to work with here.


One of the biggest obstacles is this little alcove behind the sofa. It's almost like wasted space with this layout. In a room that isn't overly large, using all the space available is key.


This is the view from the front hall. The side of the couch isn't exactly welcoming. 
Time for a new layout.


First things first, we switched the couch to the long wall. Truth be told, she had tried this layout previously, but again, that little alcove across the room made achieving a cozy feel difficult. Everything just seemed too far apart - not exactly conversation friendly.


To solve this issue, we placed her pre-existing round occasional table in the alcove and her chairs flanking the table, but more toward the center of the room. 

One of the biggest mistakes people make is putting their furniture against the wall. Move it away from the wall and you immediately form a cozier space.


One either side of the fireplace we created vignettes with a bit of height to balance the mantel. The bench was repurposed from their bedroom. The artwork was hung just below eye level to add that layered look.

Always hang your artwork at eye level, give or take a bit, of course. It's another common mistake I see time and time again. 


We moved her bombe chest to a previously empty wall and accessorized with family photos.


The butlers tray/bar found a new home in an empty alcove next to the fireplace. We accessorized her coffee table simply with vintage cigar boxes, a tray and candle. 

Like I said, she made it easy on me by having great stuff. It just needed a little tweaking. Thanks, Linda, for letting me play in your living room.

until next time,
Read more ...

Bedside Storage

I'm back in the guest bedroom, working on furniture placement. You know, I changed the layout to allow for more room on either side of the bed, which is great, but now I actually need a bedside table.

I'm going for an eclectic, collected, cottage feel. But it also needs to be functional, provide storage and most importantly fit my budget constraints which are cheap, cheap, cheap.


Enter the basket with tray combo. The texture and warmth of the basket feels so cottage-y to me. And the tray helps to make it more functional. And it definitely fits the budget criteria because I already had both! Perfect. Of course, they did have previous lives.


This campaign style tray used to be part of a butlers tray table that held decanters in the dining room. Unfortunately, the stand part of the table broke a couple of years ago, sending all our decanters crashing to the ground. 
{Can you believe only the cheap ones broke, all the vintage pieces made it. Just goes to show, they just don't make things like they used to. But that's another topic for another post.}

Anyway, I painted it the same color as the dresser to help tie the pieces together. {Color inspiration for both pieces came from the sheet set, which I am slightly obsessed with. I don't even want to think about what I will do if this set ever wears out.} I also used a bit of Rub n' Buff on the corners to help them pop.

And if you ever need to access the storage space, you just lift the whole tray instead of each individual piece. Easy, peasy.


The extra storage provided by the basket is great. Seasonal blankets and extra pillows can be stored in the room instead of the downstairs linen closet. Plus, the closet in this room is super small, so leaving that space free for guests is nice. 

Have I mentioned how much I love this basket? I bought it several years ago at Ikea in the UK. Unfortunately, the basket they carry now is more modern. If they still carried this model I'd buy them by the boat load. It looks great everywhere from the mudroom to the living room to the bedroom. 


Great, this side of the bed is sorted. Now, I must move on to the bedding. As you can see I finally washed and changed the bed. The basic bedding is staying the same - sheets, bed skirt, matelasse bedspread and quilt were all pre-existing {everything but the quilt dates back almost 13 years!}. It's just a matter of adding on some layers to make it feel like a nice, cozy cottage bedroom. Wish me luck.

linking in with:

Until next time, 
Read more ...

Food Challenge: Coconut Cake


A couple weeks ago, we had a mini London reunion over dinner at a friend's house. When I asked if I could bring something, she suggested dessert. Then suggested the specific dessert, then gave me the recipe. Well, ok then. Food challenge accepted. 


As most of you know (as does my friend) I am not a lover of the baking. I usually do anything I can to avoid it and when that doesn't work, I go straight to the boxed good items. That's like baking, right? Kind of? Not really.

Anyway, I read over the recipe, and thought to myself, yikes, this is the kind of cake that I made when I was dating my now husband for his birthday. Once a year. As soon as we got married, I went back to the boxed cakes. Hey, courting works both ways!


This cake is so intense (both in terms of making and flavor), I'm not even going to try and break it down for you. Following along with the recipe on foodnetwork.com will probably be easier for both of us! But I'll still fill you in on the steps I took and any substitutions, etc.


First things first: make the custard.

  • 3/4 cup whole milk
  • 3/4 cup unsweetened coconut milk
  • 1/2 vanilla bean, seeds scraped out, bean and seeds reserved (I omitted this)
  • 4 large egg yolks
  • 1/3 cup granulated sugar
  • 3 tablespoons cornstarch
  • 2 teaspoons coconut rum (I omitted this)
  • 1/2 teaspoon pure vanilla extract

Combine the milk, coconut milk and vanilla bean and seeds in a medium nonreactive saucepan; bring to a simmer over low heat.

Whisk the egg yolks, sugar and cornstarch together in a large bowl. Slowly whisk the warm milk into the egg mixture. Return the mixture to the pan, set it over medium heat and bring to a boil. Cook, whisking constantly, until thickened. Scrape the mixture into a bowl, remove the vanilla bean and whisk in the rum and vanilla extract. Let the custard cool to room temperature, then cover with plastic wrap and refrigerate until cold, at least 2 hours.


Next up: make the cake

2 tablespoons unsalted butter, at room temperature (for the pans), plus 12 tablespoons cold butter, cut into 12 pieces (for the cake)

  • 2 1/4 cups cake flour, plus more for the pans ( I used regular flour)
  • 1 cup whole milk, at room temperature
  • 6 large egg whites, at room temperature
  • 1 vanilla bean, split lengthwise, seeds scraped out and reserved ( I omitted this)
  • 1/2 teaspoon pure vanilla extract
  • 1 3/4 cups granulated sugar
  • 1 tablespoon plus 1 teaspoon baking powder
  • 1 teaspoon salt

Preheat the oven to 350 degrees F. Butter and flour two 9-inch-by-2-inch round cake pans and line the bottoms with parchment paper. Whisk together the milk, egg whites, vanilla seeds and vanilla extract in a medium bowl.
In the bowl of a stand mixer fitted with the paddle attachment, mix together the 2 1/4 cups flour, the sugar, baking powder and salt. With the mixer running on low speed, add the 12 tablespoons butter, one piece at a time, and continue beating until the mixture resembles moist crumbs. Add all but 1/2 cup of the milk mixture and beat on medium speed until pale and fluffy, about 1 1/2 minutes. With the mixer on low speed, add the remaining 1/2 cup milk mixture. Increase the speed to medium and beat for 30 seconds more. Scrape the sides of the bowl and mix for 20 seconds longer. Divide the batter evenly between the cake pans and smooth the tops with a rubber spatula.
Bake until a toothpick inserted into the center comes out with a few crumbs attached, 22 to 24 minutes. Cool in the pans on a baking rack for 10 minutes. Run a small knife around the sides of the pans and invert the cakes onto the baking rack. Remove the parchment paper and let cool completely, about 45 minutes.

Step 3: Make the coconut simple syrup

  • 1 tablespoon granulated sugar
  • 3/4 cup sweetened flaked coconut

Combine 1 1/2cups water and the sugar in a saucepan and bring to a boil. Stir in the coconut, remove from the heat and let sit for at least 30 minutes and up to 4 hours.

Strain the liquid into a clean saucepan. Bring to a boil and cook until the mixture is slightly reduced, about 5 minutes. Let cool.


Step 4: Make the coconut filling
3/4 cup Coconut Custard, cold
  • 3/4 cup heavy cream, cold
Combine the coconut custard and cream in a bowl and whip until soft peaks form.


Step 5: Make the buttercream


  • 3 sticks unsalted butter, at room temperature
  • 1/3 cup confectioners' sugar
  • 3/4 cup Coconut Custard
  • Pinch of salt
Beat the butter and confectioners' sugar in a stand mixer fitted with the paddle attachment until light and fluffy, about 4 minutes. Add the coconut custard and salt; beat until the buttercream is smooth.


Step 6: Toast coconut
2 cups sweetened flaked coconut, lightly toasted


And finally: Assemble


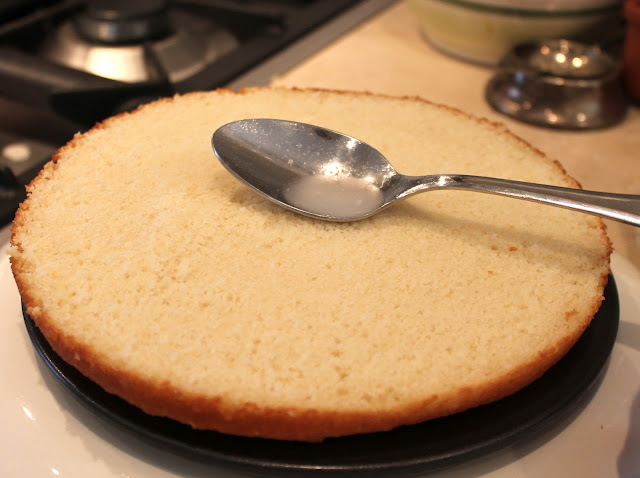
Use a long serrated knife to slice each cake horizontally into 2 layers. Reserve one of the flat bottom layers for the top of the cake. Place another one of the layers on a cardboard round, cut-side up, and brush with some of the coconut simple syrup. 


Spoon one-third of the coconut filling onto the cake, and using a small offset metal spatula, spread it into an even layer, leaving a 1/2-inch border around the edge of the cake.


 Repeat with 2 more layers. Brush the cut side of the reserved cake layer with the remaining syrup. Place the layer, cut-side down, on top of the cake. 


Frost the sides and the top of the cake with the buttercream. Pat the toasted coconut onto the sides of the cake and sprinkle some on the top.


Step 592: ENJOY! 

Seriously, it may feel that way when you finally finish the cake, but it is worth it. Delicious. So, if you are looking for a true celebration cake give this one a try. You will NOT be disappointed.

Until next time,
Read more ...
Related Posts Plugin for WordPress, Blogger...

Lijit Ad Wijit