Last I left you, we were enjoying a cold one on our new peat gravel patio. As promised, I am back with the how-to.
Before we get started, I'm just going to tell you straight out: we totally winged this. If you know what you are doing, please feel free to stop reading now. On the other hand, if you know what you are doing and could use a good laugh, please feel free to carry on reading. Either way, suit yourself.
I think I might of mentioned that we added over 2 tons of dirt to this garden. Previously we had some drainage issues in this space. Hopefully the extra dirt and the new gutter Mr. DD added to the garage will help with that. But anyway, I digress, what I want to tell you is that we borrowed this handy-dandy level from our neighbor. It slides on two strings, which are attached to stakes; once you get it level, you can eyeball the grade that you want. We sloped the level of the dirt away from the garage and into the yard. Well, at least that's the plan. We've yet to test it with a good rain.
ANYWAY...
Once we had the dirt how we wanted it, we loosely mapped out the shape of the patio. Then we used the old fashioned compass method to make our circle. Pretty sure the string shifted, but it still looked fairly circular to us, so we went with it. It's about 70" across. Oh, and I should say we centered it on the window; again, just eyeballed it.
We laid our bricks to the outside of the circle and dug about a 3 inch trench to lay the plastic edger.
My apologies for the series of shots including the blue bucket and turquoise pots. I was playing around with future plant placement, which then turned into a fun game for our pre-schooler.
Here's the afore mentioned plastic edger. We used a 20' length that we cut in half {with herb scissors} for each side.
Note the turquoise pot: placeholder for potential blueberry bush.
We dug about a 1.5" trench for the bricks, placed the bricks, then stepped on them a couple of times. This highly technically method allowed for the bricks to stand just a smidge above the plastic edger.
Note: The brick pavers are from Home Depot. Sienna tumbled, $.49 a piece. Not part of the original plan, but sure glad they were added in this weekend. Definitely gives it a 'finished' look.
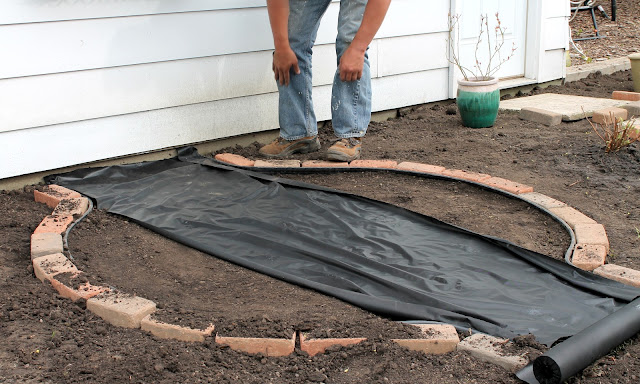
Down went the landscaper paper to try to keep the weeds at bay. Not sure how well this stuff really works as we used it in our raised bed kitchen garden and some weeds have already poked their way through. Oh well, you always have to try. Besides, I am sure it could be worse.
Finally, the gravel was poured in and raked into place. We used 6 small bags, which is enough for about 2 inches of depth. Truth be told, we could probably add another bag or two. I'm sure they will make their way into our cart with the next Home Depot run ;)
And there you have it. A down and dirty how-to on our peat gravel patio. I hope you enjoyed and maybe even found it to be vaguely useful.
until next time,


