Designing Domesticity Our Home Projects Food Services Shop About

The Entryway, aka: Your Calling Card

"Your entry is your calling card to the world", Susanna Salk.


You've heard me say it before, the entry sets the tone for the whole house. Which is why I decided to give mine a bit of a spruce this year.


In keeping with my love affair for the constant switcher-oo, I moved the cedar chest out of this space around Christmas time. The idea came to me while brainstorming ideas to create a less formal and more family friendly dining room {more on that later}. Plus, the addition of more workable surface space in the entry was an added bonus! 
Two birds, one stone, you know?


Decorating for the holidays was great with all my new surface space, but when the decorations came down I was left with a lot of space and not a lot of ideas. That's when I remembered the quote from Susanna Salk. 


I knew casual elegance was the look I was going for. But what next? Must I really define my style and highlight it in my entryway? That seems pretty daunting. 


So I started simply: a collected look, with nothing too matchy-matchy; mostly well-worn English traditional with some Asian influences. Something that has come together over many years.


Yup, that about sums it up - in a sentence. At least for today.


Let me break it down for you: 
trunk - thrifted, junk shop, England - relocated from the office
lamp - hand me down from my parents, has been sitting in the attic for 2+ years
mirror - Graham & Green, London - relocated from the powder room
bird cage/bird print - HomeGoods
brass ginger jar - Etsy

I'd say that's collected. Not to mention random. But there's a method to my madness. You see, there's not much natural light in here...placing the mirrors opposite each other helps to bounce around what little light there is. But obviously, you can't just have a hall of mirrors {Cincy shout out for any of my hometown readers!}, hence the bird print leaning against the mirror. Birds are a common theme around the house, so a cage only seemed fitting. And the lamp, well, I need something pretty sizable, and with the addition of the new shade, it went from back porch to front hall, if you know what I mean. Plus, I thought it worked well with the floral mirror...takes the mirror from country to slightly Asian influenced. The brass ginger jar ties in with the metallics in the mirror on the opposite wall. And the gigantic, leather trunk - well, why not?!?! It fills the space, adds that vintage collected vibe and reminds us of our time in London. Win-win. And there you have it, a look inside my mind when it comes to creating a curated look. 

Have you updated your entry lately?

Linking in with:

Until next time,
Read more ...

Mod Podge Mirror

Thanks to all for bearing with me last week while I recovered from our crazy weekend/week. Feeling slightly more with it now and ready to share a couple more projects I've tackled recently. Starting with this cute little mod podge mirror that I hung in our entryway.


I'd been looking for yet another mirror to hang in this space for quite some time. Mr. DD suggested this little guy that has been taking up space in the attic since we moved in. I decided to give it a go...


But after looking at it for about a week, I decided it really need a little makeover. I wasn't digging the flower or the metallic frame. What to do, what to do?


First, I applied a thin layer of 'brass' spray paint, but immediately realized this was far too shiny and fake looking.


I toned it down with a 'bronze' colored, gold leaf, craft paint. But, unfortunately, the paint didn't do anything to cover the flower. And that's the part that bothered me the most.


So I weighed out my options and decided to go old school with some Mod Podge glue and left over fabric from the new living room cushions. One coat as adhesive and 4 coats as sealer later, we're looking at a fully customizable mirror for the space. 


Check out the reflection - it's the same fabric. I mean, come on! How cool is that? 
{fyi, I did cover the top layer of sealer with a very light layer of the bronze craft paint, just to tone down the bright, newness of the fabric.}


I'm loving how this side of the entry is looking much cozier, warmer and brighter at the same time. 

I'll be back later in the week to share the other side of the entryway. Careful inspection of the last couple of posts probably reveals quite a bit already...

Linking in with:

Until next time, 
Read more ...

Reader Renovation: Happy Husband

You've heard the expression: happy wife, happy life? Well, this reader and good friend, Sara, brainstormed and completed a little project to make a happy husband. What a great wife! But more importantly, a great project that I just had to share on... 

{Reader Renovations}

Every single time my husband walked through our living room to our front door, he shook his head and grumbled. They violated style, yes, they did, but even more than that, they violated order. Yet there they were: the cords, the cords, everywhere the cords. A tangled mess of wires and cables and cords of the phone, lamp, DSL, you-name-it-variety lay on the floor behind the desk that was ousted from the office to make room for a crib for the third bundle of joy. 
You know how you start to get used to something that used to bother you in your own home? Well, that didn't happen to my husband. While it kind of did to me, I decided to devise a plan to hide the cords and restore order to my home (or at least to the floor by the desk). I thought that if I somehow made a back to the open desk, the cords could be hidden and life could be neater. And my husband, happier.

First, like any good wife, I gave my husband a few jobs: measure the space behind the desk, buy plywood (the thinnest he could get), and cut it to the measurements. Meanwhile, I went to the local fabric store and searched for fabric to wrap around the plywood. Now, I must pause for a moment and say that I get TOTALLY overwhelmed at fabric stores. Like, I really need my mom next to me to tell me what to buy. Either that, or I need one of my kids with me as an excuse to leave the store empty-handed, because, well, I am too distracted to make a decision. However, since I didn't have my mom or my kids with me, I circled the upholstery section and forced myself to narrow it down to a couple fabrics, trying to decide if I wanted something that would stand out (a pattern perhaps? a complementary color?) or if I wanted something to blend in. In the end, I decided to go the blended route and chose a textured gold fabric (on sale too!). 
I ironed the fabric, grabbed the cut plywood and a heavy-duty stapler. I enlisted the help (supervision?) of my oldest child while the younger two napped and got to work. I basically wrapped the board like a present, stapling the middle of all four sides before doing the corners and edges so that it was even. I only covered one side since I knew the desk was always going to be against a wall.
Once the fabric was stapled to the board, my husband got a hammer and used brass brad nails and began pounding the board to the back of the desk. A few in each side worked out just fine. 


We were able to hide all of the cords behind the board, but one problem remained: the DSL modem and wifi router. The modem needed to be plugged into the phone jack located behind the desk, but because of obvious dimensions, it could not hide behind the board. I wanted to hide the modem/router in something, and after a shopping trip to Homegoods, I found a canvas box to do the trick.


And that’s where this story ends, with hidden cords and a happy husband. Life is good.

Thanks so much Sara for sharing this project. Such a great idea and one I might very well be taking on to hide all the TV cords in our living room.

Remember, I'm looking to feature at least one reader a month, so if you have a design dilemma or a project you're particularly proud of, please get in touch.

Until next time, 
Read more ...

Stuck in a Rut

I just realized I've been stuck in a rut. How did this happen? Me, the perpetual re-arranger, stuck in a rut? Not possible.


It's true, it's true. I've just realized that I have had these same three candlesticks on my coffee table since we moved into this house, which is slowly creeping in on 3 years now.
Sure the other accessories have changed over the years, but not the candlesticks. 
I can NOT believe it.


Nothing breaks a rut like a forced rearrangement. 

Here's how it happened: I had to clear everything off the coffee table to make room for the precious cheese board at our annual FSCP. Hence the forced rearrangement.


Instead of just storing away my beloved candlesticks, I figured why not just relocate them. You know, change it up a bit - it's only been 2.5 years after all. 


As long as I was working on the mantel {again}, I figured I might as well throw a bit of spring into the mix. Who can blame me, it's been the mildest winter I've ever experienced in Chicago. 

Fresh green paired with white feels so springy to me. 


Of course, it's still only February, so a bit of winter coziness is in order - candles and pinecones.


The perfect mix of spring time greenery and wintery coziness.
Hello late winter/early spring mantel. I hope you stay awhile, perhaps not almost 3 years, but awhile all the same. 

linking in with:
Until next time, 
Read more ...

Powder Room Reveal

You've seen the stencil and the mirror, but you haven't seen them together...until now!


Welcome to our newly glamorized powder room.


The new scheme has proved to be pretty tonal, but I'm liking it. {White and cream together has always been a favorite.} In fact, the slightly wilted roses are the only bold color in the space, and clearly, they aren't a permanent feature.


I've kept the rustic hanging shelf, because along with white and cream, casual elegance is also one of my favorite things. Nothing crazy here on the shelves: soaps, scented candle and extra TP. It's not rocket science. 


But not everything in this space is new. In fact, the beautiful brass towel bar was here when we moved in.  I'm so happy we didn't trash it when we remodeled this room in the early days. 


The crystal and brass light fixture is also original to this room. I knew immediately, we'd keep this piece; a good cleaning was all it needed to really shine. And of course, it adds that bit of glamor that I really wanted in this space.


So, there you have it. An updated bath with a casually elegant feel. I may, very well, be in love. How about you?

Linking in with:

Until next time, 
Read more ...

Gold Leafed Mirror


Our newly stenciled powder room was crying out for an updated mirror, something to match our new glammed up look. Initially, I started trolling craigslist and our local discount shops, but I kept coming up empty handed. 


I wanted something with loads of detail and an antiqued look {kinda like this one}.


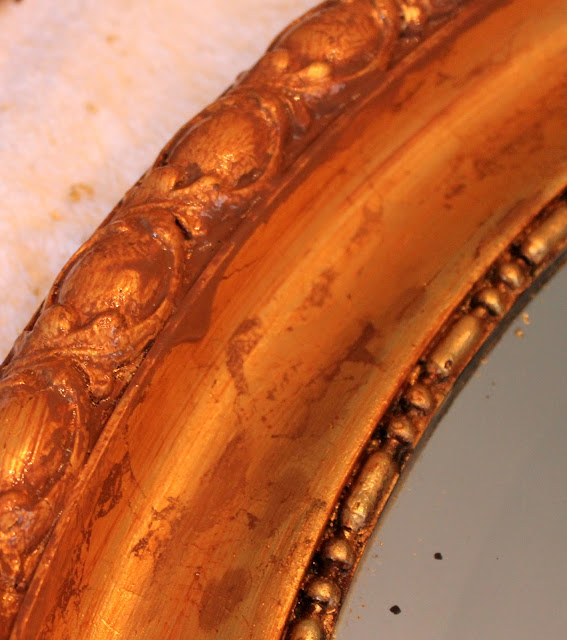
Then I remembered an old mirror that we picked up in London years ago for our nursery/guest room. It was pained a cute rosy pink with golden accents. I loved it when we bought it but never really found a great place for it in this house. 
{sorry this is a terrible before picture, but it makes the after look that much more spectacular, right?}


Solid wood with beautiful details, it's a perfect candidate for a little makeover. 
{this picture was taken after a coat of adhesive was added, hence the shine.}


To achieve my desired glamorous, antiqued finish, I decided to give gold leafing a try. 
I ordered two packs {25 sheets each} of gold leaf composite, adhesive, sealer and an antiquing glaze and got started.


Once the adhesive was dry, each gold leaf sheet was applied using a foam brush. I quickly realized that the foam brush wasn't allowing the gold leaf to get into all the little nooks and crannies so I moved forward using my hands. Needless to say, it started to get a bit messy.


Despite my best efforts, I still couldn't get every little bit covered. At this point, I grabbed my trusty Rub N' Buff in Antique Gold and used a craft brush to cover the bigger areas.


I assumed, in advance, that I'd want to add an antique glaze, and I'm so glad I did. I was really surprised by how bright the gold leaf was. 


I covered the mirror with several layers of glaze to achieve my desired look. And, of course, went back in with a craft brush to darken the nooks and crannies. 


After each layer, I wiped away the excess with a clean towel. 


And now, I have a brand new, much more glamorous, antiqued golden mirror. 
What do you think? 

Can't wait to show you the mirror paired with the stenciled wall. The powder room has a brand new look and I'm lovin' it!

Linking in with:

Until next time, 
Read more ...

The Project that Almost Did Me In {aka stenciling my powder room}

In my February plan post, I mentioned I wanted to do some work in our powder room. I'd always thought I wanted to have a statement paper in my half bath, but papers are expensive and not for the commitment-phobic. 


The next best thing, I thought, would be to stencil it. I'm not talking about the little stencil borders, I'm talking about an all over bold, graphic pattern - something that might give the impression of wall paper. 
These types of stencils are all over blogland and true to form, I assumed my normal mantra: if I've seen it done, surely I can do it too. Well, let me just tell you, this is the project that nearly had me hang up my beloved DIY hat. Whoever said stenciling is easy, clearly never worked in a small space with lots of corners and moldings.


Here's the brief play by play: It started off easy enough,


Then started to get a bit trickier as I neared the corners,


And THEN became almost laughable when the corners met up with the moldings.

At this point, I realized that the stencil was NOT going to be perfect. Once I came to terms with that, the whole project became much more manageable. In the end, I had to cut the stencil to make smaller pieces that would fit my space. Whatever works, right? 


So, it's done. 
I thought it would only take me an afternoon. But, in reality, it was a two day project. Mostly because I had to keep walking away because it was SO frustrating, but also because my girls were not wanting to nap! {also very frustrating.}

Is it perfect? No. 
Did I go back through with a craft brush to fix some of the bigger areas? You bet I did. 
Did I get crazily obsessed over it? I tried not to.
Does it look like wallpaper? Maybe from a distance, but certainly not up close. 
Am I still happy with the outcome? Yes, I am. 

Linking in with: 

Until next time, 
Read more ...

Chandy: Basic to Statement

First, I'd just like to say: Wow, I've received so many nice comments about my living room - thank you, thank you, thank you! The living room has really come together over time with the majority of the items being second hand, so you're approval means even more to me. 


But today, I'm not here to talk about the living room; I'm here to talk about the dining room. I've mentioned that our dining room is slated for a makeover later this year. I've started my research for new lighting and....I'm shocked at the prices for chandeliers. I've never really LOVED my old chandelier that came with the house, but I started thinking maybe I should try to spruce it up a bit before I just go out and purchase a new one, willy nilly.


So, here she is, my basic brass chandelier. 
Truth is, she's pretty unoffensive; so unoffensive she kind of blends into the room. 
Hopefully not when I am done with my mini-makeover.


First step: (Much like the new hooks in our kitchen), I used the brass ager to minimize the shine and distress the finish a bit.


Then I added burlap shades and a burlap chain cover. One of the objectives of our dining room makeover is to, hopefully, make the room more approachable and less formal. 
And I have to say, all this burlap is making it look so much better and much less formal!


I especially like the new look at night - beautifully textured light with much better atmosphere. Amazing what a little shade will do for you. 


Will I eventually get a new chandelier, maybe. But will this one work for the time being, yes.

My Chandy has gone from basic to statement.

I guess it pays to take another look at what you have before you replace it.

Until next time, 
Read more ...
Related Posts Plugin for WordPress, Blogger...

Lijit Ad Wijit