Designing Domesticity Our Home Projects Food Services Shop About
Showing posts with label furniture rehab. Show all posts

Junky Dresser Turn Media Stand

I hope you didn't stop by today in hopes of finding some sort of dining room reveal, because that just did not happen. The good news is, we got started on the dining room. The bad news is, progress is slow going. The plan is to share updates weekly, so definitely stick around to see how we are getting along.


In the meantime, I wanted to share this junky dresser that we refurbished into a media center for our family room. Yup, it's hard to believe that this beauty was transformed from a $30 cast off, we picked up several months ago.


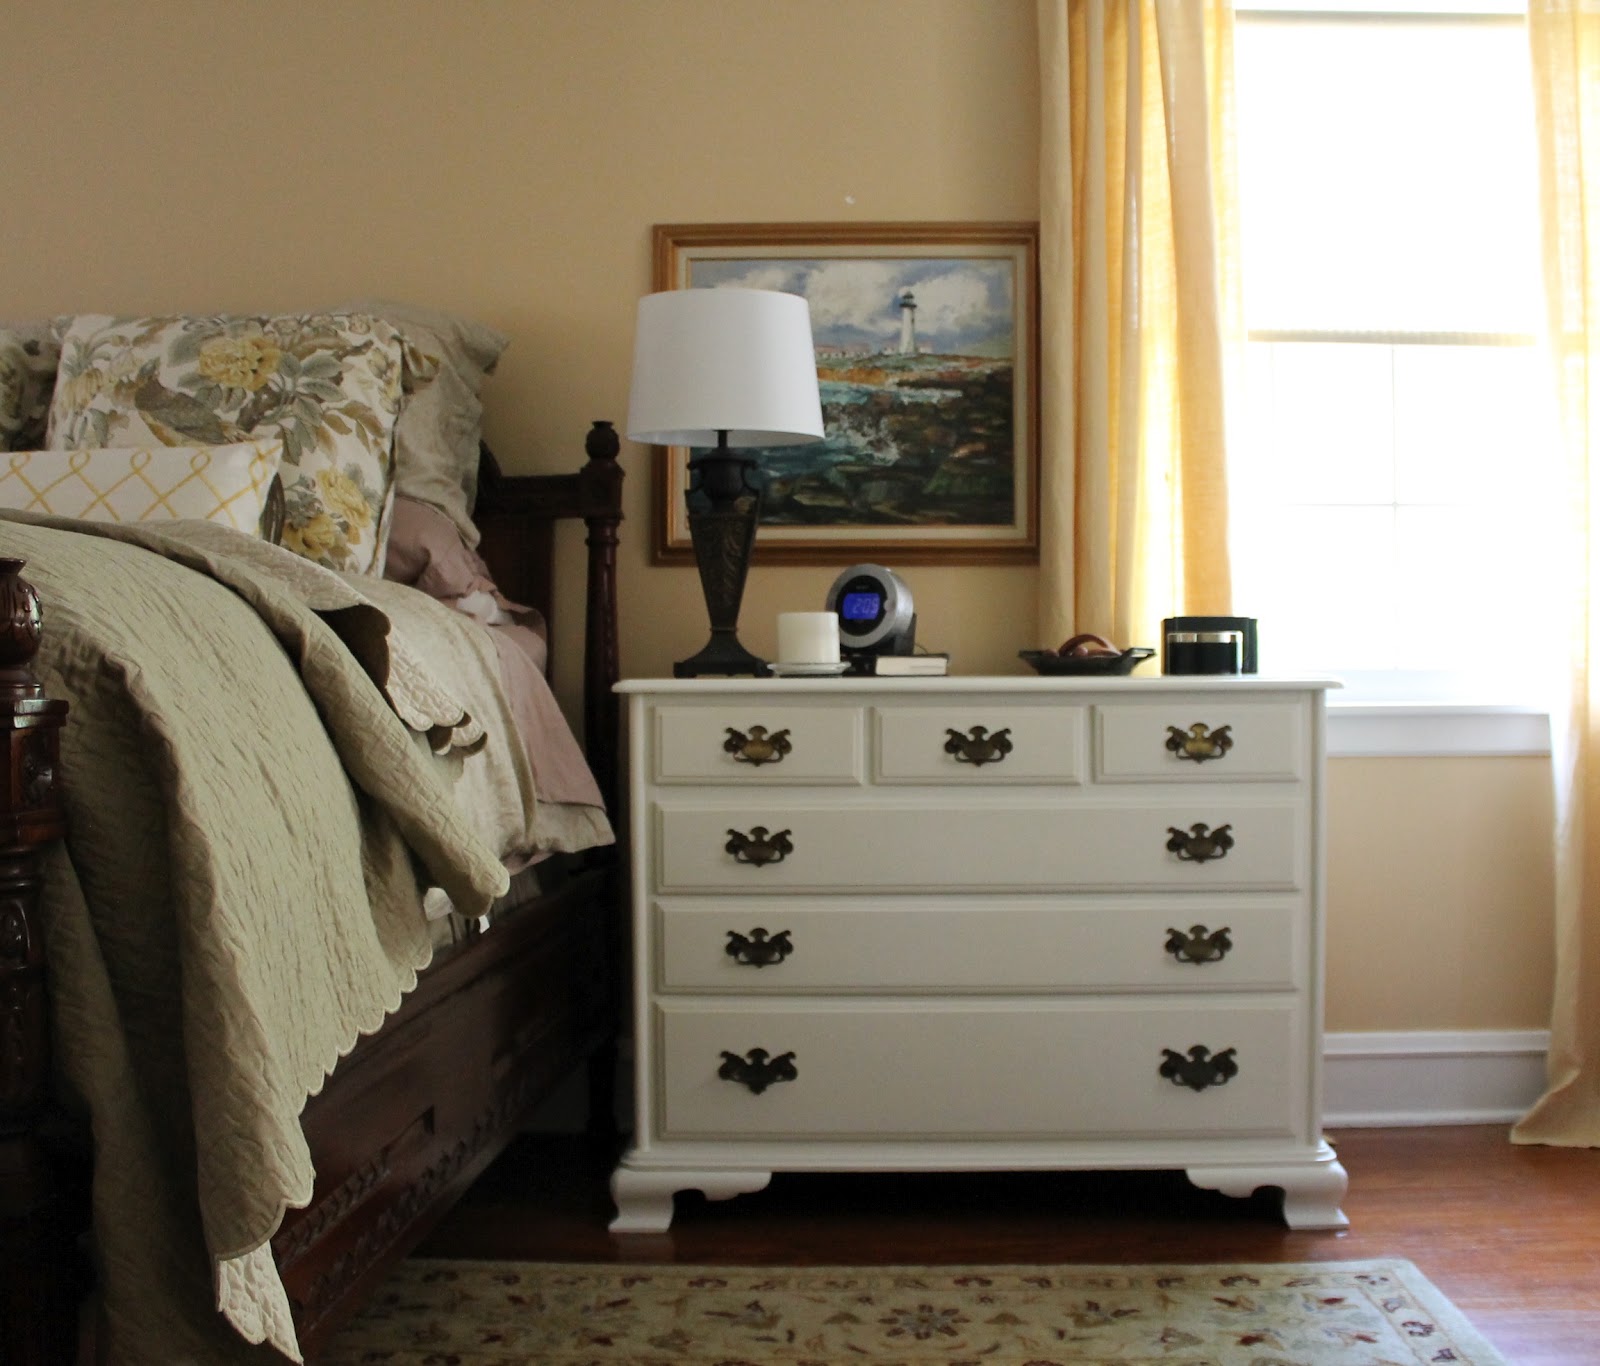
After we moved our old dresser/media stand from our family room into our bedroom to act as a nightstand, we started the hunt for a new media stand. Then one day, we ran across this junky dresser. Even with it's broken drawers, missing hardware and bad finish, we knew she had potential. 


I put Mr. DD right to work. Just kidding. He was super excited to work on this piece. Especially with his little helper. 


The body of the dresser and the salvageable drawers received a good sanding, while we came up with a plan to make the space work for us. In the end, we decided to remove the second drawer entirely, which made space for the media components. 
Perfect. 
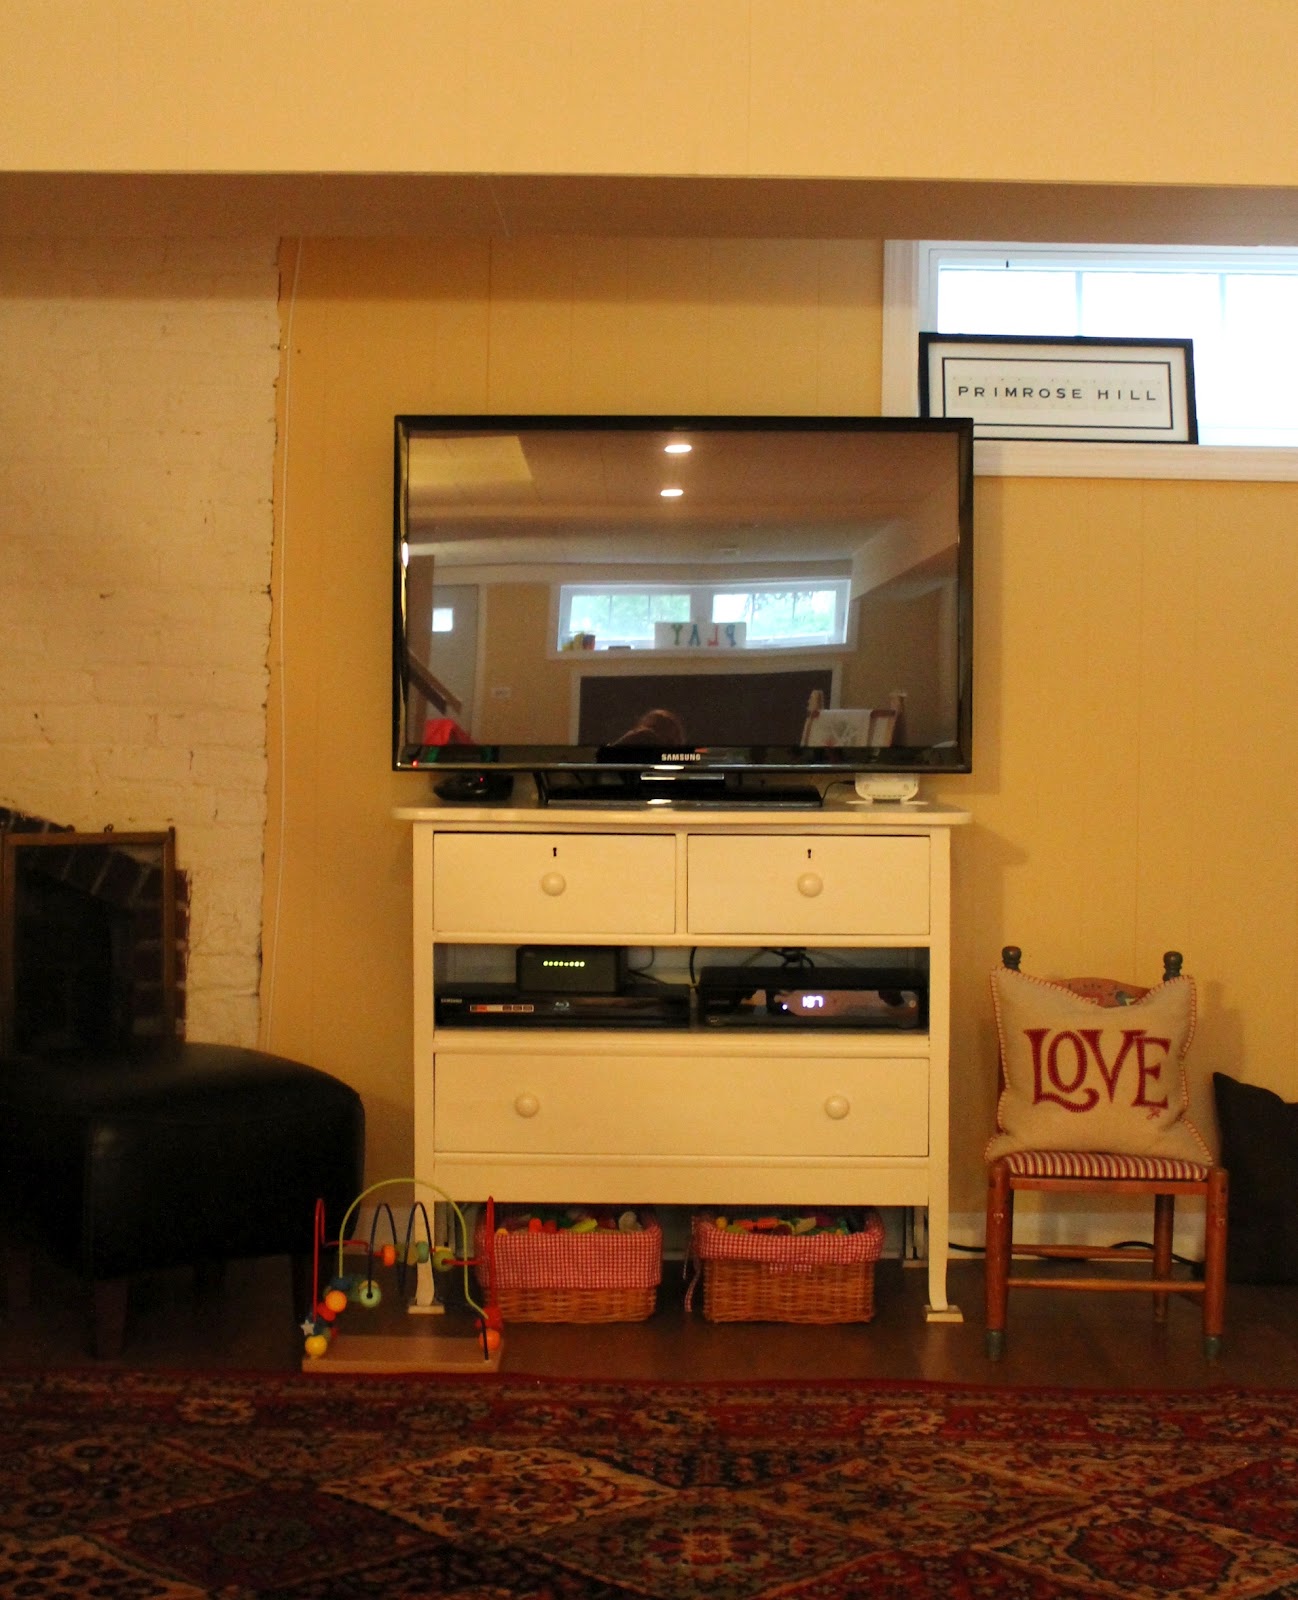

Two coats of primer, two coats of paint, and a layer of clear wax later - she's all ready to go. 
And finally, the TV is off the ground again. 
Now our family room, which is nothing more than a glorified basement playroom, that is desperately in need of a little TLC, is one step closer to feeling more complete. 

What a difference. Hope you had a great weekend!

linking in with:

until next time, 
Read more ...

It Takes Two

"It takes two to make a thing go right, it takes two to make it outta sight."
 Oh, Rob Base and DJ E-Z Rock, thanks so much for recording a song that provided the momentum I needed to finally get this project done. 


After 10 months of looking at this dresser, which was acting as a temporary TV stand in our basement, I decided the time was right to give it a matching makeover (to the other dresser). I mean, who wouldn't want to paint, outside, when it's 100 degrees?

So, why didn't I paint them at the same time? I have no idea. Maybe because Mr. DD wasn't too eager to add yet another dresser to the bedroom. We already had two. 


But, you may remember, adding additional storage to our bedroom was high on my wish list. So, when we found both dressers on craigslist, the solution became obvious. Turn these basic, well-used, maple dressers into our bedside tables. How else can you have four dressers in one room without it looking crazy?

One coat of primer, two coats of BM White Dove, and a light application of Golden Oak stain has given both dressers a brand new look. 


You may also remember that lightening and brightening our bedroom was second priority only to the increased storage. Flanking our dark, antique bed with the white dressers has done just the trick. 

Convincing Mr. DD to add the dresser was hard enough, convincing him to rearrange the furniture was a whole other issue. Come back later in the week to see how I finally convinced him with the new arrangement. 

linking in with:

until next time, 
Read more ...

My Love/Hate Relationship with Milk Paint

I've been really dragging my feet on the re-vamp of my second antique chair. The feedback on the first chair was good in theory, but I also experienced my first round of really very negative comments. You win some, you lose some - I guess. 


But we've had a couple of cold, rainy days around here so I finally had time to turn my attentions to this second chair. As I mentioned previously, these chairs were purchased together and in quite a state of disrepair. Once they were repaired, I opted to paint them with milk paint in light cream. 


Here's where it gets interesting. Now, I've used milk paint in the past {check it out here}, but this project really drove it home for me. This is some seriously finicky stuff. Look at the differences between the right chair and the left. Both in the same starting condition, both painted with the same paint.


Milk Paint comes in a powder form that you mix with water when you're ready to use it. It has a fairly short shelf life, recommended to be used within 24 hours. Since I knew I wouldn't be painting both chairs at the same time, I split the powder in equal parts and mixed up half the paint, saving the other half for the other chair. Makes sense, right? I thought so too. 


The first chair received two coats of paint. The paint, literally, distressed itself. Sticking in some places and not in others - but it did cover nicely with two light coats. 


The second chair took 4 coats to cover. And it didn't distress itself to the same extent as the first chair. Why? I'm not sure. Both were painted with the same paint, same conditions, etc.


So, what's the moral of this story? If you're a control freak and want the exact same finish from project to project - this is not the product for you. But if you're interested in achieving an authentic, antiqued, distressed look this product will certainly help you get there. 

Fortunately for me, although these chairs will be in the same room, they won't be side-be-side so the differences won't be quite so obvious. Either way, I'm still loving the look of this pair. And I'm really happy to mark another project off the on-going list for the master bedroom

Have a great weekend.

linking in with:

until next time, 
Read more ...

Chair Restoration: Paint and Upholstery

Hopefully you aren't getting too sick of this chair just yet because I've got a bit more to cover. Namely, paint and upholstery.


{need to catch up? click here for the reveal and re-tying springs}

As you can probably tell, I choose to reupholster my chairs in a loose weave burlap fabric. Due to the weave of the burlap, I did not remove the existing fabric. But I did remove the existing trim, which I would consider step 1 of this stage of restoration.


Next up, paint selection and application. 

I knew I wanted a distressed paint treatment for these chairs because they were already in pretty shabby condition. So, I went with my favorite standby: Milk Paint in light cream. 


Milk paint is a finicky one for so many reasons...you mix your own paint, first of all. Not the best for consistency. 

I do like that you don't have to prime first and of course, it's non-toxic.

But, it really does have a mind of it's own. It distresses itself. Literally, sticking some places and not others. I really don't understand it, but I do love how it looks. 


For this project, I used 2 light coats, letting it dry overnight between coats. A quick, light sanding exaggerated the naturally distressed look. And finally, one coat of clear wax added a nice richness to the exposed wood and provides a protective finish for the milk paint.


Ok, on to the new upholstery. Now, as I said in my first post about this chair, I've never taken on such a big project. I've recovered a dining chair and that's about it. That being said, this is probably the next step after a simple dining chair. 


I started on the back, by simply stapling the fabric at the top, bottom and both sides. Making sure to hold it tight. Then fill in with more staples, where needed. Triming off the excess fabric. Sounds pretty simple, right? Probably because it was. 


It got a bit trickier around the arms of the chair. Cut, fold, tuck, staple. Not much more to it. 
Did I mention that I did this with just a plain, old, chunky staple gun. Of course, I'd love a fancy one, but I don't think extensive reupholstering is in my future. We'll see. 


And lastly, my favorite part, the trim. Make sure you choose something wide enough to cover your staples. I went with a simple, cream woven trim. Then I hot glued it in place. Certainly goes along way to make this project feel like a professionally completed job. 


That's all she wrote, folks. 
It's the end of the story of these formerly sad and neglected, now mostly shabby, slight chic chairs. 


until next time, 
Read more ...

Chair Restoration: Re-tying Springs/Upholstery Webbing

Well, one thing is for sure, this post will not be filled with beautiful images of my recent chair restoration. Instead, you'll be treated to various views of the underside of an old chair. Lucky you. 
But seriously, old chairs with springs stuck out the bottom should not be feared, this project was actually easier than I thought it would be.


Here's how she looked when I decided to tackle this project. 

I started by removing all the old webbing, which some people say you can salvage, but in this case, it just wasn't meant to be. 


Step 1: Secure the string. Start with the end of the string facing the center of the chair, nail or staple to the frame. Double over and staple/nail again to ensure a stable string. 

{I used a heavy duty jute twine and a plain old staple gun}


Step 2: Secure the string to the spring. Pulling the string tight, loop around the closest side of the spring, making sure to press the spring as tightly as possible. Then loop around the further end of the same spring. Press the second spring to the same general height and loop around the right side and then left. Trying to keep the tension of the springs as even as possible. Secure the string on the chair frame, as in Step 1. Repeat for each row of springs.


Step 3: Repeat Step 2, to form a grid over the springs. In other words, if step 2 is horizontal, step 3 will be vertical. Make sure to connect your vertical strings in the center of the spring to the horizontal strings.


Step 4: Continue in this fashion until each spring has been fully secured. I chose to go with just four ties, as show above, because these chairs are VERY occasional chairs. If your chair will receive a lot of use, I'd recommend going with at least 6 ties. You can see the original string in this shot for reference. 


Step 5: Secure your upholstery webbing to the chair frame as in step 1.


Step 6: Pulling the webbing as tight as possible, cover one horizontal row of springs at a time, securing to the opposite side of the chair frame. 


Step 7: Add the vertical strips of webbing in a basket formation.

{you can go one step further and hand stitch the springs to the webbing}

And you're done. See, that wasn't so bad, right? Ok, maybe it was a bit involved but it's worth it to salvage a chair, wouldn't you say?


So, here she is. 
Clearly, you can see the webbing from the front. 

Mr. DD said it should of been tighter, but you can literally bounce a quarter off these springs as is. I think it's just the look of this chair, at least that's what I am telling myself. Kind of reminiscent of the new deconstructed look they have going on at Restoration Hardware these days.


You didn't really think I would leave you without at least one nice photo, now did you?

I'll be back later in the week with more details about the paint treatment and upholstery.

until next time, 
Read more ...

Mostly Shabby, Slightly Chic Chair Makeover

Let's see... I don't even know where to start when it comes to the story of these chairs. Yes, they are a pair. And yes, I have had them forever. And yes, I have procrastinated on fixing them up for at least a couple of years now. 


Probably because it's one of the biggest projects that I have taken on to date. There was the re-glueing of the frame, the re-tieing of the springs, the installation of new upholstery webbing, the painting and distressing and finally the reupholstering. So I am sure you can understand my apprehension. 

What's that? 
Enough of my jabbering. Bring on the before, you say.
Well, if you insist. But I must warn you, it's really bad. One look and you'll understand why they sat around waiting to be repaired for the last several years.


And just so can fully understand the extent of this project...


Zoinks. Lots to be scared of in this picture. 

I read a tutorial or two online. Watched a video. And in true Liz style, I jumped right in and tackled it my own way. It may not be perfect, but it's a whole lot better than it was. 

{to view my post on re-tying springs and attaching upholstery webbing, click here
to view my post on paint selection and re-upholstery, click here.}


And now it's the perfect bedside chair. Just chippy enough to distinguish it from the white bedside dresser.  Too much white can be kind of boring, in my opinion. Gotta mix it up just a bit. 


Well, as you can see, this side of the room is coming along swimmingly. Or should I say, my side of the room. Shame I have the matching dresser and chair both waiting to be worked on.
Of course, Mr. DD doesn't care about a new bedside dresser or the perfect bit of white chippy-ness to accompany it....so there's no rush, or so he keeps telling me. Men

What did you get up to this weekend?

linking in with:

until next time, 
Read more ...

Lessons Learned, the hard way {No.4}

When learning a new skill, some lessons just have to be learned the hard way.


Like when painting outside, sometimes the sun can come out so quickly and unexpectedly that it dries your primer before you can get a smooth coat. When this happens, the only choice is to sand down and start over. Grumble, groan.


Or when you are trying to fit in just one more quick errand while toting around two fussy kids, you can make silly mistakes. Like requesting the wrong paint color and not realizing it until you have already painted the first coat. White Dove does not equal White Down. Hmmm...


All you can do is embrace these mistakes and try to learn from them. A light coat of Golden Oak stain took my bright white dresser to a more muted antique white. Lesson learned. 


Styling is also a series of trial and error around here. Third times the charm. Fortunately, I was lucky enough to score two matching dressers from eBay. Dressers as bedside tables? Yes, please. I told you I needed storage. And the white is really going along way to lighten the look in this room. So far so good. 


Until next time, 
Read more ...

I'm on a Roll


Last week I shared my newly revamped cedar chest and my plans for our guest room. Keeping those things in mind, what do you think I tackled first in the guest room? If you said, paint that hideous bed frame, I'd say, I wish I was that motivated! 

Instead I started off a little more low-key and tackled this ugly dresser.


This ugly dresser has had quite the ride with us. 
We bought it a long time ago; in fact, this was the dresser that Mr.DD was forced to purchase when we moved in together. Of course, I was super excited to finally be living together, but I wasn't excited about his stuff moving into my already packed-full place. So I casually mentioned the dimensions of the only available spot in my condo, and low and behold this dresser just happened to fit. Will wonders never cease...


Seeing as this was the first piece of furniture that we purchased together for our shared home, we couldn't just ditch it. We loved it. We loved it so much, we hauled it all the way to London with us. That's right, this cheap, fruitwood dresser with wonky drawers moved overseas with us. Of course, it did.

While in London, we subjected our guests to this dresser. Over and over again. Even after, in our first place, the water heater tank leaked, causing the ceiling to fall through, right on top of the dresser. Miraculously, the dresser was unscathed. Minus, the slightest bit of water damage that only caused the drawers to become more wonky.


But never fear. We continued to love it. So much so, that we moved it back with us to the US. And here we are, almost 10 years later, treating our guests to the same cheap, wonky dresser. You've seen it in every home we lived in, but you've never seen it like this...


Now, it's cheap, wonky and a beautiful shade of robin's egg BLUE. Totally different, but yet, still the same. 
You're welcome. 

linking in with:

Until next time,
Read more ...

The Tale of a Cedar Chest

Once upon a time there was a sad, beat down, cedar lined chest. Listed for sale on eBay, just hoping that someone would come along and fix her up.


I fell hook, line and sinker for her sad story and brought her home with me. What can I say, I was pregnant at the time, and to say I was a bit emotional would be an understatement. Unfortunately, she didn't make it any further than the garage for several months.


Then, last weekend, when the Spring-like temperatures aligned perfectly with two napping girls, we pulled her into the driveway in the hopes of furthering her story.

 From a distance, she didn't look too bad, but up close you could see the handiwork of the family cat.


With electric sanders buzzing, we developed a plan for this neglected lady.

And like all good fairy tales, it involved a bit of magic, and hers took the form of milk paint. 

You may remember when my love affair with milk paint began? It's chemically safe, cleans up with soap and water and is VOC free - not to mention perfect for getting that naturally distressed look.


I hand painted her with 3 coats of Old Fashioned Milk Paint {Light Cream}, gave her a little TLC in the form of some light distressing and finished her off with 3 coats of paste wax. 


And now she's ready for her next chapter to begin. 


Perhaps she'll find her next home in someone's front hall...she'd be happy there, greeting everyone day in and day out.

{this is the truest representation of the paint color}

Or at the foot of someone's bed. Happy to hold seasonal clothes in her cedar lined depths. 


Or even in a mud room. The options are truly endless. 

If you're interested in making room for this lovely lady in your home, please email me directly {designingdomesticity@gmail.com} for details or check out my craigslist listing.

linking in with:

Until next time,
Read more ...
Related Posts Plugin for WordPress, Blogger...

Lijit Ad Wijit