Designing Domesticity Our Home Projects Food Services Shop About

It's beginning to look...

a lot like Christmas.

Now that Thanksgiving has officially passed and December 1st is right around the corner, it's time to start decorating for Christmas.

I have a hard and fast rule that no Christmas decoration shall be placed within my home until Thanksgiving is over.


So in the meantime, my laundry room has been run over with decorations waiting in the staging area. I am almost bursting at the seams...both in space and patience, I just can not wait any longer. Fortunately, I don't have to.

Tomorrow, I'm planning a post featuring my first Christmas vignette - I hope you check back for it!

Throughout December I'll be posting on everything from more Christmas vignettes, to tips for outdoor planters,  to mantels, to crafts, and baking - stay tuned.
Read more ...

Saturday's Kitchen: Turkey Enchiladas

Are you looking for something to do with all that left over turkey other than the typical turkey tetrazzini?

Well, this recipe has been bouncing around my family for years and now I am sharing it with you. It's a quick and easy midweek recipe that is sure to please and works with any left over meat.

I think it came from Cooking Light, years ago, but I really can not be sure anymore.

Turkey Enchiladas

Ingredients

Filling
3 c chopped cooked turkey
2 c shredded Monterrey jack cheese w peppers
1/2 c sour cream
1 4.5 oz can chopped green chilis, drained

Sauce
1 8oz sour cream
1 8oz mild green taco sauce

flour tortillas
salsa, avocado, green onion for garnish (optional)


Combine turkey, 1 c cheese, sour cream, and chilis in large bowl and stir to combine.

Combine sour cream and taco sauce in small bowl and mix well. 

Spoon  a small amount of sauce into bottom of casserole. Place a small amount of filling into each tortilla and roll into cigar shape, place in casserole, repeat.

Spoon over remaining sauce. Cover with remaining cheese.

Place in a 350 degree oven and bake 35-40 minutes.

As always, if you try it and like it please do let me know.
Read more ...

Thanksgiving Table

I'm not hosting Thanksgiving this year, but I am still responsible for the table decor - yeah! And just to make sure everything runs as smoothly as possible, I felt the overwhelming desire to have a dress rehearsal.


Not a full blown dress rehearsal, that would be crazy, just a simple setting for four. Way less crazy, right?


I've added a runner, some additional candles and leaves.


 Of course, my placecard holders are included as well. If you'd like a refreshed on how these were created, click here.


Ah, I have to say, I really love this centerpiece. It's not traditional, in the big floral arrangement kind of way, but I like that about it. Plus, the neutral colors will really allow the food to shine.

Well, that's it for me this week. I'll be back for Saturday's Kitchen, which will feature a great recipe for all that leftover turkey.

Happy Thanksgiving to all!
Read more ...

Fabric Covered Corkboard with Ribbon Lattice

This past weekend I attempted one of my most challenging projects to date....the fabric covered corkboard with ribbon lattice.

I've actually been putting this project off for quite sometime because I was intimidated by it and I have to say, rightfully so, even with two sets of hands, it really was tricky.


I knew I wanted to give it a tufted look, so I purchased batting and a heavy weight chenille fabric. I planned on using left over ribbon from other various ribbon projects (check them out here and here) in the big girl room as well as buttons remaining from my draft stopper project.

I started by stapling the batting to the center of my corkboard.


Then stapling the fabric to the back of the corkboard.

It's hard to tell how great the chenille looks on the corkboard from this picture, but it really does looks great!

The next step was to lay out the ribbon and attach to the corkboard. Seems easy enough. Unfortunately, not so much. In fact, I was so frustrated during this stage that I completely forgot to take pictures! Very unlike me.

Anyway...we tried several patterns and color combinations until we settled on just the right look. When we went to attach the ribbon (I was using a staple gun), it would shift and the entire pattern would be ruined. We must have re-stapled each ribbon and intersection at least 5 times. But we got there in the end...it isn't perfect, but close enough.


As a finishing touch, we added multicolored buttons at each ribbon intersection. These were hot glued on top of the staples. We also added a final ribbon around the entire perimeter of the corkboard, which was attached with fabric glue.


Special thanks to my mom, who was in town visiting for the weekend and probably hadn't planned on spending 4 hours covering a corkboard! I really couldn't have done it without her!


There she is all decked out and in place in the big girl room.

Phew, another project done, meaning we are that much closer to the big reveal.

Read more ...

Saturday's Kitchen: Pumpkin Roll

This Saturday, I am featuring a family favorite recipe - the pumpkin roll.

Traditionally, in our family, my Aunt Linda makes one every Christmas. It wouldn't be the holidays without it!

But I got to thinking, why don't we enjoy the pumpkin roll for Thanksgiving as well? It's a great alternative to your traditional pumpkin pie.

So, this year, I'll be making one to travel with me for Thanksgiving!

Ingredients
cake:
3 eggs
1 c sugar
3/4 c flour
2 tsp pumpkin pie spice
2/3 c pumpkin
1 tsp lemon juice
1 tsp baking soda

filling:
8 oz cream cheese
1 c confection sugar
1 tsp vanilla
4 tbs butter

Directions
cake:
Beat the eggs until light and fluffy, add all other cake ingredients and mix well. pour into a well greased or wax papered jelly roll pan (15x10). Bake 15 minutes in a 350F oven.
Turn out onto a tea towel that has been dusted with confection sugar, dust top of cake with more confection sugar. Roll into towel and allow to cool.

filling: combine all ingredients and mix well. once cake has cooled, unroll and frost evenly. Roll up, wrap in wax paper and refrigerate overnight.

As always, if you try it and like it, please do let me know.

Happy Holidays!
Read more ...

Simple Thanksgiving Centerpiece

Take a peek at my simple Thanksgiving centerpiece.


He lives in our breakfast room, anchors the table, and welcomes all.


A large hurricane filled with grape vines and leaves, sitting in a white bowl lined with burlap and filled with gold dusted pine cones, leaves and glimmering pears.


Beautiful textures come together to make for a subtle but lovely display.


And adds just a touch of bling for the most festive of occasions.

Who knew a centerpiece could say so much without saying anything at all!

Read more ...

Chalkboard Chargers

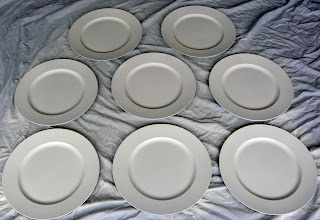
Doesn't it feel like everything is chalkboard these days?!? I mean, Pottery Barn is selling chalkboard rocks for crying out loud!

Well, I can't help but be influenced by this trend and am jumping on the bandwagon with Chalkboard Chargers.


I first saw this idea on Tatertots and Jello and thought it would make a great gift, especially for that hard to shop for person on your list!

A brief play by play on how to make your own:

Prime with a plastic loving primer (if your chargers are plastic). Let dry (20 min).

Spray with chalkboard paint. I used 2 coats. Let dry completely (24 hours).

Rub all over with chalk and wipe clean - they are ready to go!
Minus the waiting time, this is another really quick and easy project.

Think of the possibilities:


Birthdays, anniversaries, holidays, good grades, first visit from the tooth fairy, first solo bike ride, and the list goes on and on.


A quick and easy way to celebrate even the smallest of occasions!


This time of year, chargers can be found just about anywhere and there are plenty of deals to be had - I've seen them as low as $1 a piece! Making them another great candidate for the perfect hostess gift!

linky parties
Read more ...

Gearing up for Guests

Do you have a guestroom that rarely gets used? I do. And it's that time of year to get her ready again!

In fact, my guestroom is on the list for a makeover, so it's never looking quite right. I definitely need to bring out the reinforcements when someone comes to stay.


Here are a couple easy steps to welcome guests into your home this holiday season.
1. Clean - give your room a good cleaning and airing out, if possible. After all, nothing says welcome to my home quite like spiderwebs, dust and neglect! I kid, I kid.

2. Personal Touches - personal touches are what make a house a home and we want our guests to feel like they are at home, only better, right? So place reading materials next to the bed, a water glass, some fresh flowers, you get the idea.


3. Extra Bedding - Sleeping well is key to having a happy guest. You never know what will make someone else comfortable when they are sleeping so have extra bedding like, pillows and blankets available.

4. Bathroom - A fully stocked bathroom can go a long way to making your guests feel like they are at home. I always seem to forget at least one item when I am traveling, so I try to have extra soap, shampoo, towels, toilet paper, etc on hand for my guests.


5. Food - It's always nice to have a little something on hand for a snack or light meal, especially if your guests have been traveling a ways to see you. I'll be making a batch of my favorite Fall soup, Butternut Squash and Apple Soup from Ina Garten's Barefoot Contessa Parties cookbook.

Um, soup!

Here's to a happy holiday season for you and your guests!

Tomorrow, I'll be back with another hostess gift idea. Hope to see you then!
Read more ...

Raspberry Chocolate Sauce

This year I'm not hosting either of the big holidays - meaning I'll be needing plenty of hostess gifts!

I love to give a homemade gift when possible. This year I wanted to give something canned, seeing as I have just learned this age-old skill, but was hoping for something a bit different than jam. We already have a great jam maker in this family!

Chocolate and Raspberries - YUM!


I scoured the Internet looking for interesting possibilities and when I ran across a recipe for Raspberry Chocolate Sauce on Canning Jars Etc blog, I knew I had found a winner.

This recipe is so easy and really quick. Not to mention, tasty!!!


Add the raspberries, chocolate, lemon juice and pectin to a pot and bring to boil over high heat. Add the sugar, stirring until dissolved. Bring to a rolling boil; boil for one minute, stirring constantly. Remove from heat. Skim foam, if necessary.


Add the sauce to freshly sterilized jars, apply lids and process in a water bath for 10 minutes. Done!


This Raspberry Chocolate Sauce has a strong raspberry flavor and sweet chocolaty finish. We tried it over vanilla ice cream and it was sinful!

A nice hostess gift and a great alternative to jam!

I'll be bringing you several hostess gift ideas in the run up to the holidays. As well as loads of holiday decorating ideas and tips. 
Read more ...

Holiday Sparkly Placecard Holders

You may have noticed that this Thanksgiving I'm loving all things sparkly and pear.


So when I saw these little ornaments at HomeGoods, 9 for $5.99, I bought them straight away and went home to brainstorm what I would do with them. It didn't take long to come up with an inexpensive transformation that will last the whole holiday season - place card holders!

I snipped off the ribbon hangers and set to work with my wire. I used 20 gauge permanently colored copper wire. Here's how I made the wire holders for the place cards:

Three fingers of wire,

wrap around the top two fingers twice,

snip off the excess and twist the wires together - done!
Easy.


Insert into the top near the stem. I didn't even have to use hot glue to secure it.

And repeat until complete!

This was such a quick, easy and inexpensive project - I wish I had bought more. And I love how they look on the table - definitely adds a bit of sparkle for any holiday table.


Holiday sparkle

You're also catching a peak at my Thanksgiving centerpiece - more about that as the holiday quickly approaches!

Read more ...

Critter Draft Stopper

The weather is definitely getting colder and the drafts from our old windows and doors are rearing their ugly heads again!

Last year, we used a towel to keep the drafts at bay in my daughter's room, I think this year I can do better than that.

I thought about buying something, but then realized I could probably make something more custom to her room and for a lot less! The main problem,  I don't sew - so where to start?

Socks.


My materials:
Over the knee socks, I found mine at Target
Felt squares
Buttons
Poly pellets
Batting
Fusing tape
Glue gun


I started by stuffing the socks. I used the batting for the foot and combination of poly pellets (at the base) and batting for the main body of the sock.


Once it was sufficiently filled, I used fusing tape to close up the end of the sock.


I created a simple pattern for eyes and a mouth on graph paper and then cut them out of felt. I hot glued  some brightly colored buttons for eyes. And then attached these with more hot glue to the newly stuffed socks.


Voila! Stuffed sock critter draft stoppers - that's a mouth full!

My daughter took one look at them and said, kinda scary Mommy - not exactly the reaction I was going for, but that's ok. At least the drafts are being kept at bay!

Linky Parties
Read more ...
Related Posts Plugin for WordPress, Blogger...

Lijit Ad Wijit