Designing Domesticity Our Home Projects Food Services Shop About

Big Girl Room: Bedside Lighting

By now, you have probably seen my first lighting project for the Big Girl Room...and how well it turned out! Unfortunately, it's not the only light in the room so I've had to move on.

I'm searching for a table lamp for between the beds. This is an important piece as it will be seen just as much as the beds, bedding, etc.

Some of the lamps I considered for this space are below.

Too adult?


The candlestick - too predictable?


cute - could be filled with something, like shells?


Owl lamp - fun, but wrong color.

Can you guess which direction I went?

That's right - the owl lamp.


After a simple coat of white spray paint we are in business. I love this lamp and I love the sense of fun it brings to the room.

Also, notice the new headboards purchased from Target. I am still trying to think of something I can do to help them become more 'special', but for now, they are just fine.

Still on the to-do list: bed skirts, accessories for the dresser including yet another lamp, and a cork board. Stay tuned...


Read more ...

Pole Lamp Transformation: Complete

Finally, the much awaited and anticipated Pole Lamp Transformation Reveal!

Here is the lamp before - just your standard brass lamp with empire shade.


And after - with a new white coat of paint on the base and cute yellow trim on the shade.


I have to say, that I am really enjoying the newly revamped lamp. It has a whole new life - and a lot more character!

Here she is in the Big Girl Room - in all her newly found glory. I love it!


And I hope you do too!
Read more ...

Pole Lamp Transformation: The Base

I knew I wanted to spray paint the Pole Lamp white, but I have to admit that I was nervous. I've never really used spray paint with good results before. That being said, every design show and blog that I have read or seen seems to sing the praises of spray paint. So, given this was a free lamp - I figured I would give it a try.

First things first, when it comes to painting (spray or otherwise) you have to prep! I cleaned the lamp with a damp towel and gave it a good drying. Then I taped off the electrical elements with painters tape. And of course, I used a drop cloth as well.


Once I had the prep done there was really nothing else to hold me back. I geared up for the first spray!


Here we go.


No going back now. Smooth even strokes, never holding the spray in one place - the first coat was done quicker that I would have imagined.


And it dried in less than an hour! The second coat filled any minor imperfections that were missed previously.


This stuff is great. And because this pictures does not give the finish justice - one more close up of the base detail.


I will never again doubt the wonders of spray paint. I have a feeling this is going to open up a whole new world of accessories for me. Very exciting!

I can't wait to put the lamp back together and into it's rightful spot in the Big Girl Room. Only one small problem:  I lost the shade finial in the yard! Humph.


Read more ...

Pole Lamp Transformation: The Shade

Once I started working on this project, I realized that it was going to warrant a bit more than two posts. Today, I will cover the shade. Tomorrow, the lamp base and Monday will be the big reveal and glamour shot. So get excited!

Here is the lamp shade before. I debated getting a new shade that might be a bit easier to work with, like a drum shade, but in the end this one was free so I decided to give it a go!


I started with the ribs, applying the fabric glue as suggested on the bottle. Some suggest using a brush to apply the glue for better coverage but I didn't have one so I just smudged it about a bit with the tip of the bottle.


Turning the edges of the ribbon over for a finished look, I applied the ribbon to the ribs.


Then the top.


Then the bottom.


As you can tell, my ribbon really wasn't wide enough to cover the existing edges, so I had to use a double layer. Fortunately, I like the look of the doubled ribbon - so it worked for me.


I think the ribbon gives the shade a much more expensive and custom look all for about $5. It will look great in the Big Girl Room, but could also work in other rooms depending on the trim selected.

What do you think?
Read more ...

Pole Lamp Transformation

You may remember my hand-me-down pole lamp ( post here ) intended for the Big Girl Room.


Well, the time has come for it's transformation.

I am thinking a little of this on the base


And a little of this (yellow ribbon) on the shade


Check back later in the week for progress and the big reveal!
Read more ...

Powder Room Blind Revealed

It's my first homemade reveal - and I am excited!

Over the weekend I finished off the Roman Blind that I started last week (check out the posts here). In the end, it was a fairly low maintenance and quick project. I probably could have finished it in a day if I really set my mind to it. But alas, procrastination is my middle name, so 5 days later and I am finished!

Here's the window before


And after


And another glam shot


Like I said before, I am really liking this look. It's casual, but elegant at the same time. I think the combination of the cotton fabric and the satin ribbon really works. And I hope you do too!

I am feeling so inspired by this ribbon trim that I already have loads more projects in mind! Stay tuned to see where I will head next with my newly acquired skill!
Read more ...

Hand Embellished Blind - Progress

As you may have read yesterday (here), I am attempting to hand embellish a store bought Roman Blind with ribbon to coordinate with my powder room. I am not usually a fiddly person, so this isn't really right up my alley, but I figured why not give it a try - this is my year of newly acquired skills after all.

Essential to this project...


I first discovered the no-sew fusing tape (aka Stitch Witchery, this is the Target version) a couple of years back when I witnessed an old friend transform a pair of jean cutoffs into a cute denim skirt just minutes before wearing it out the door (her creativity was always such an inspiration)! Needless to say, for a non-sewer, I was immediately in love with this product. Through the years, I have used it on a lot of things - from hems on clothes to curtains. I have no complaints.

So, let's get started. First, I ironed the blind - no one wants to adhere ribbon over wrinkles that won't come out later!


Then I folded the ribbon to a 45 degree angle in order to achieve a mitered corner look. The outermost edge was placed an inch away from the top of the blind and an inch away from the side (fortunately there was a seam to follow along the side).


Then the ribbon was placed over the fusing tape and ironed in place.


Matching up the corners to form a perfect mitered look proved to be the trickiest part. But if you check after each pressing and the ribbon happened to shift, you can pull them apart without too much trouble. I had to do this a couple of times - hey, it was my first time too!


All in all, I am really liking the look of this blind. And it was pretty quick.


I think the possibilities for this are endless...I could see it in a kid's bedroom as well as an adult room, it would really just come down to the ribbon that you choose.

Check back on Monday for the big reveal!
Read more ...

Hand Embellished Blind

When we first moved into this house our powder room looked like this:


Think bisque-colored sink and toilet and yellow metallic wallpaper on all walls and the ceiling! It was obvious that they were trying to make the most out of a very small dark space, but I really wasn't feeling the yellow metallic paper. So, it had to come off. And then the bisque fixtures had to be switched out. And then we added bead board and it all started to feel a bit more like home.


My long term goal is to find a bold wallpaper. Nothing livens up a small dark space more than a statement paper.   But for now, we settled with a bronze paint color- something a little different, but not too out there.

I have continued to struggle with the window treatments. While I am aware that the plantation shutters are a nice traditional feature, I just don't like how dark they make the room feel. So where to go from here? I am thinking some sort of Roman Blind.


Inspiration struck when I saw this photo, but the color options were all wrong.


So I am bound and determined to make something similar using this ribbon.


Wish me luck as I am sure I will need it. I'll be posting the results soon.
Read more ...

No Cost Re-do

As promised, the details from last Friday's fun.

Here is the living room before:


As you can see, it's a big room with a fair amount of light coming from the large picture window. The color on the walls is light and bright and the carpet is very neutral. The furniture is currently lining the perimeter of the room, which definitely shows off the size of the room.

The client expressed an interest in having a casual living room with plenty of room for her kids to play. The living room also provides access to the front door, TV room, master bedroom, stairway and dining room therefore the traffic flow had to be a top priority. The artwork on the far wall is her favorite piece in the room and she is looking to get rid of the over sized chair and ottoman.

So, taking all this into consideration we worked on a new layout using her existing furniture and accessories. We talked about pieces that could eventually move into this space as well as inexpensive ideas to modernize what she has.

After:


First, I moved the couch out from under the picture window to perpendicular to the fireplace. Next, we temporarily placed the oversize chair opposite the couch, with plans to reupholster an existing loveseat to go in that space in the future. The new arrangement focuses on the two focal points of the room, the fireplace and the picture window; it allows for easy access to all the other rooms; offers a casual spot for conversation as well as plenty of space for the kids to play. Taking cues from her favorite artwork and an existing area rug, the color scheme has started to come together - steely blue greys with hints of coral. And finally, the more modern photo over the fireplace was switched out for a mirror to reflect even more light into the space (unfortunately, we didn't get around to hanging it before I left).


Easy updates that won't cost a lot of money: throw pillows incorporating the new color scheme, new lamp shades, bigger area rug and of course, accessories for the mantel and tables.

I think the new arrangement works well for this space and meets all the clients' needs. Not bad for a no cost re-do!

Read more ...

A First Time for Everything

Exciting news - On Friday, I experienced my first official client work! And let me tell you - I was so nervous! What if I couldn't produce on the spot; what if I had no ideas, what if, what if, what if. I really had no idea what to expect.

Don't get me wrong, I have certainly extended my sometimes unwanted advice on friends and family (with usually good results), but never on a perfect stranger. But this is my goal, so I had to do it. After all, there's a first time for everything!

A little bit about how it came to happen:
A very good and extremely supportive friend recommended me to a friend of hers, who was having trouble sorting out her living room. I was told she had inherited her grandparents home and had spent the last year updating it to her taste. And that's about it.

So off I went, with my two year old in tow, (we decided to make it a bit of a play date as well - very nice and accommodating of her!) into the unknown. I made it there without getting lost and anyone who knows me knows that is a real rarity even with a SAT NAV in my car! I was already feeling pretty proud of myself. Needless to say, I was not so lucky on the way home and managed to add an extra hour onto the commute, resulting in no nap time for the little one - but it was all worth it for the experience!

Anyway, once the kids started playing and the conversation started following, I shared some ideas regarding her current layout and how I felt the space could work better for her. Eventually we moved some furniture around and talked about future purchase plans and color scheme possibilities. We didn't get as much accomplished as I would have liked, mostly due to the restraints of four playing children, lunch, and a lot of whining by my child, but I felt it was a successful first step for her and for me!

My very good friend even offered to take some before and after shots using her fancy camera and far superior skills, so I should have those to show you shortly.

All in all, a very good Friday and a very good first step into the wide world of client work!
Read more ...

Big Girl Room: Stage 3

As you know, I have decided to focus most of my energies on completing the Big Girl Room (catch up here). So far all has been going a little too easily; I've found the right pieces and started to develop a plan and feel for the room. It's heading down the eclectic, shabby chic, vintage country route - think washed out quilts, hand painted furniture that looks like it's been collected over time, etc, etc.

And I've been pleased so far.

When it came to the rug, I didn't want to make too big of an investment - this is a kid's bedroom after all. I wanted something soft underfoot, with a light pattern to hide the inevitable dirt and stains, but nothing too grown up. After one purchase and return from HomeGoods, I came across this lovely green rag rug from Pottery Barn and it fit all of my criteria. Sold. I like how it picks up the green from the curtains and takes the emphasis away from the blue walls.


Now, feeling really smug I moved onto bedding. I decided that I just wanted a couple of accent pillows for the beds; to keep things simple - trying to keep my 'client' in mind.

I did the usual laps through Target, HomeGoods, Bed Bath and Beyond, Pottery Barn Kids, Land of Nod, etc. and came up with nothing. It was proving to be incredibly difficult to find green, blue and yellow bedding for kids - everything was blue and red for boys or pink and purple for girls!

So, when I got the email from Pottery Barn with a link to their bedding sale I was quite excited! On clearance I found two Euro Shames in a vintage inspired quilt featuring all my colors! And at $14.99 a pop, I knew it was a steel and ordered two immediately!


It looked perfect...online. When they finally arrived, I loved them; perfect with the walls, carpet, curtains, etc. But when I got them on the beds - not so much. The cute periwinkle bed skirts look horrible. The blue in the sham is much more of a teal/turquoise and definitely not the direction I had originally intended.


Fortunately, I am a roll with the punches kind of girl, and the more I look at those shams, the more I liked the teal/turquoise. Especially after the bedside cabinet was added, which incidentally used to serve as our medicine cabinet in London and has since sat under-appreciated in our guest room.

So, now it's back to square one when it comes to accessories, lighting and bed skirts!

Do you agree - would you have chosen the blue in the shams over the blue in the bed skirts?

Read more ...

On the Seach for Sconces

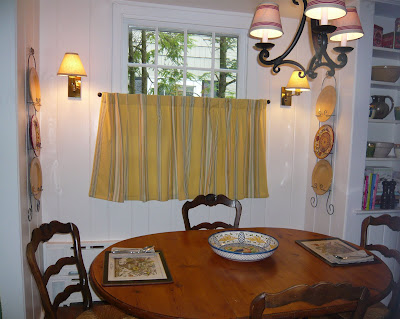
I've been meaning to get new sconces for our breakfast room for as long as I can remember.


I replaced the ceiling fixture and just assumed I would find sconces at a later date. Not a good idea. I have been looking for almost a year now.


The current sconces are of the swing arm variety in brass. The previous owners used this space as a Den and I think the sconces really speak to that. Definitely time for a change.


Recently, I have had a bit of luck: check out what I have found.


I like the rustic qualities of this one and think it will go well with our chandelier, but worry about it being flush mounted to the wall.


Again, the rustic qualities and hand made iron look of this one is very appealing, but it might be a bit over the top. Does it look too theme-y?


Is this one too safe?


too predictable?


Which one do you like? Or should I keep looking? Any recommendation on where to find great, affordable lighting?
Read more ...
Related Posts Plugin for WordPress, Blogger...

Lijit Ad Wijit