Designing Domesticity Our Home Projects Food Services Shop About

Is it Spring yet?

I've spent the whole of the weekend slowly coming out of my sickness-induced fog - mostly relaxing, sleeping and eating - three of my favorite past times! But I did manage to find some time to interject a bit of Spring into our home.


A sweet, white African violet.


Wrapped in burlap and placed under an iron crown - for a slightly different take on your typical cloche.


But if you're experiencing weather similar to ours, Spring still feels miles away, which is why we spent the majority of our weekend enjoying this...

A cozy fire.

I hope you had a nice weekend as well.

Until next time,
Read more ...

Simply Embellished Window Treatments

I'm still slowly plowing through our long list of wants in the guest suite. For a reminder, click here.

This past weekend I decided to focus on the window treatments.

Here's where we started...


I picked up this valance from a big box store shortly after we moved in. I never really loved it, but the price was right, so it came home with me.

When we decided to update our guest suite, I knew the valance would be one of the first things to go.

This whole project kicked off due to my local Crate and Barrel closing - they were literally selling everything in the store. I managed to pick up a display curtain rod and rings for a bargain basement price.
It was a sign - time to start in on the curtain project.

You may recall this photo from my sink skirt post last week.

Target curtain panel in natural linen.

As you may expect, I used Stitch Witchery to create a one inch hem across the bottom. Easy. I hung the curtains, stepped back to take a look and thought - BORING.

I definitely needed something to take these curtains up a notch.

How about this...

Upholstery webbing
It's natural, slightly rustic, with a slight French feel to it - perfect!


I won't go through all the ins and out of attaching this, because we all know I used Stitch Witchery. And to be honest, you're probably getting sick of hearing me sing it's praises!

But I will tell you that I doubled up to ensure a secure hold and I left about an inch at the top and bottom to fold over and secure to the backside of the drapes.


So, what do you think?


Are you diggin' this little something extra - a bit more texture and interest?


It's subtle, but still enough to be interesting, right?

Of course, I love it.

Let's hear what you think?


Until next time,

Read more ...

A Pictorial Party Recap

Providing a couple images from our party is the least I can do, seeing as you all so graciously listened to my prep ramblings for a whole week. I hope you enjoy!


The living room decked out with food and drinks!


The dining room and Mr. DD serving a tray of Whiskey Snowballs.


The Bar


Why do people always hang out in the kitchen?
Which, as a side note,  is definitely the worst room in our house!


Thanks to all our friends for joining us for our 2nd annual February cocktail party!


And a very special thanks to our London friends, who read about the party here on Designing Domesticity and flew over (from London, for 24 hours) to surprise us just hours before everything kicked off! I swear, we would of invited you if we thought you would of come - lesson learned! You're definitely on the invite list for next year! Black tie required.


Until next time,


Read more ...

$16 eBay Chair Reveal

Yesterday I left you with my freshly slipcovered wing chair...


But I think we all agreed that it needed a more finished look.


I decided to fold the excess fabric under and pin with upholstery pins.
I love how this shows off the shape of the piece.

But I'm not done yet!


I decided to add nailhead trim.
Have you worked with this product yet?
It's essentially a roll of nailheads - every 5th nailhead has a hole where an actual nailhead can be applied. If you look closely you can see that they all connect, but it's a small price to pay for this type of convenience - at least in my book!


Maybe not every one's cup of tea, but considering this is just a slipcover and being only $17 - this was too good to pass up.


Here is the trim along the base of the chair.


And here it is along the curve of the arms.

Ready for the big reveal?

Just one more of the before!


And finally, the after!


Nailhead trim and upholstery pins help to give this basic slipcover a custom tailored look at very budget friendly price.

Thanks again Sarah at Three Boys for the inspiration.

Until next time,
Read more ...

$16 eBay Chair

It's true, I've developed a little bit of a love affair with eBay as of late.

You may remember my eBay dresser overhaul from a couple of weeks ago. Well, when I was clicking through to leave feedback on the seller another little item popped up and peeked my interest.

If you follow me on Facebook you've already seen a sneak peak, or perhaps you caught a glimpse in one of my posts from last week.

Here she is!

The fabric is in good condition, although slightly dated and the overall shape is nice; the proportions are a little smaller than anticipated, but for $16 I really can't complain.

I got straight to work with a slipcover I purchased online.


Like most slipcovers, this one required a bit of tweaking...but I have to say, slipcovers have come along way since I last used them.

I ordered this one online, it was marketed as a stretch twill by Maytex.


I must admit that when I first opened the package I thought it would go right back. It's soft like a nicely worn t-shirt and it has a very subtle stripe, that from a distance reads as a solid - neither of which I had anticipated when I ordered it.

But after a bit of tweaking it looked like this...

That's better.

I think it needs more though. Taking a cue from Sarah over at Three Boys, I think I'm going to give it a bit of the nail head trim treatment.

Stop by tomorrow for the reveal, that is if I manage to get it done tonight!


Until next time,
Read more ...

Skirting a Footed Sink, a Pottery Barn knock-off

Yesterday I showed you my guest suite bathroom mini-transformation and promised a tutorial on my no-sew, pleated sink skirt.

Here she is again...


In case you were curious, I took inspiration from Pottery Barn.
Check it out...


Not bad, right?

Anyway, here's how it played out in my world.

I started with an inexpensive pair of 96" curtains from Target, that I originally purchased for our guest bedroom window.


Fortunately due to the window in our guest bedroom requiring short curtains, I was able to cut 30" off the bottom. The perfect amount needed for my 29" high sink!


After ironing, I got out my trusty stitch witchery and gave them a 1" hem.

This is where it starts getting interesting. I knew I wanted some sort of gathering or pleating, but seeing as I don't sew, I really didn't know where to go from here. After a bit of time spent researching, I discovered iron on shirring tape. I found mine here.


Are you familiar with shirring tape? I wasn't. But just like stitch witchery, it can be ironed into place. The top and the bottom are corded; simply pull the cords and scrunch up the fabric.


It was so easy and took all the sewing work out of making pleats!


Voila, pleated skirt - no sewing necessary!

Next, it was just a matter of attaching sticky backed Velcro to the skirt.


And then attach it to the sink itself!


I used two panels to allow for a split down the middle for easy storage access.


I am so happy with the outcome of this little project. It really smartens up the look of the bathroom and provides that extra bit of storage that we really needed.

Now, I just need the rest of the bathroom to transform itself!
Think that can happen?

Until next time,

Read more ...

Cheap and Cheerful Vanity Update

We had a great time at our annual cocktail party this past weekend - I'll be sure to post some photos and recount some of the unexpected surprises of the evening later this week.

But in the meantime, I'd like to share this quick vanity update from our 3rd floor guest suite.

Here are a couple shots of the before:

Sink, before


Medicine cabinet and light, before

This bathroom still has a long way to go, including a new paint job - but we did manage to tackle a couple of the more glaring issues.

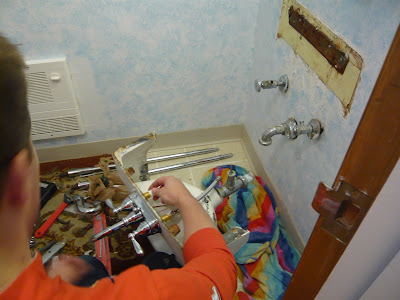
The faucet had a slow drip and no matter what we did, we just couldn't fix it. And believe me we tried!


Yikes!

So after a couple hours of this, we ended up with this...

That's better!


Finding a light to fit this space was a tough one - can you saw awkward!
This $13 beauty from Lowe's will do the trick!


I made this no-sew pleated skirt to cover the base of the sink.
Check back later in the week for a tutorial!

Before


After

Still aways to go, but we're making progress!

Until next time,

Read more ...
Related Posts Plugin for WordPress, Blogger...

Lijit Ad Wijit